In this article will try to explain you how easily one can create an Adobe Flash application embedded in Webdynpro for ABAP.
But why Adobe Flash??? Is webdynpro for ABAP is not good enough to develop beautiful UI?
Well Flash is good to develop highly interactive UI so if you are looking to develop Rich UI just go for it.Webdynpro is still recommended to develop and form based applications. Starting with our tutorial Our Mission is: A pie chart which shows the number of claims submitted in different line of business as shown billow.

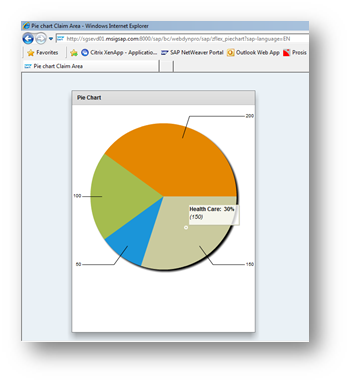
Step1 : Install Flash builder ( I used 4.6 ). Download it from http://www.adobe.com/support/downloads/detail.jsp?ftpID=5517
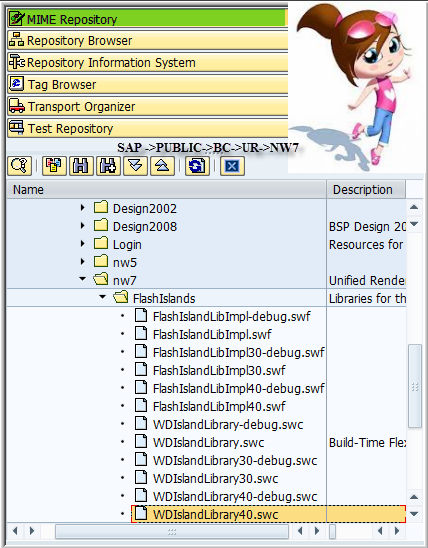
Step2 : Download the Library from your SAP system from MIME repository .( Tcode : Se80 )
Step3: Start Your Flash Builder and create your Flex Project.
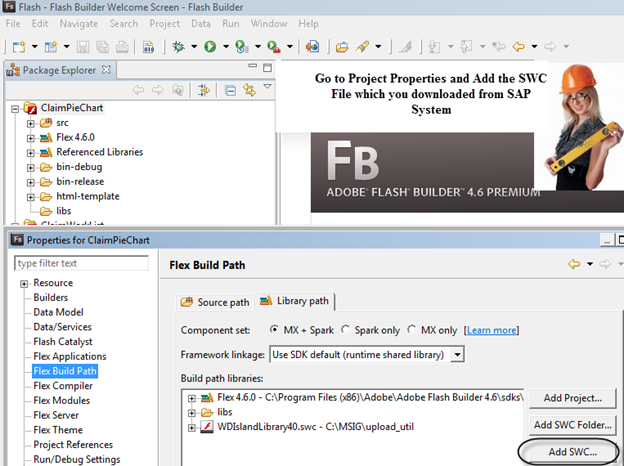
Step 4:
Open your SAP system and develop a webdynpro for ABAP Component which gonna be your main application.
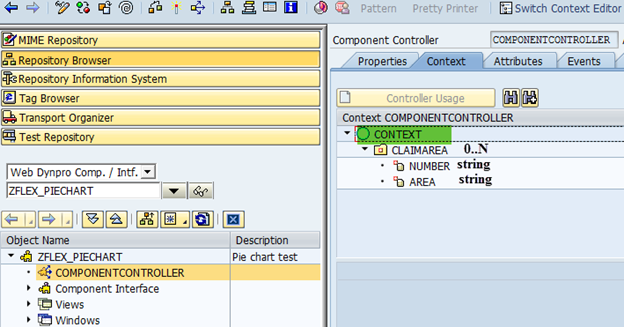
Write a code to initialize this node :
method WDDOINIT .
DATA lo_nd_claimarea TYPE REF TO if_wd_context_node.
DATA lt_claimarea TYPE wd_this->Elements_claimarea.
DATA ls_claimarea like LINE OF lt_claimarea.
* navigate from <CONTEXT> to <CLAIMAREA> via lead selection
lo_nd_claimarea = wd_context->get_child_node( name = wd_this->wdctx_claimarea ).
*
ls_claimarea–AREA = ‘Personal’.
ls_claimarea–number = ‘200’.
APPEND ls_claimarea to lt_claimarea.
ls_claimarea–AREA = ‘Package’.
ls_claimarea–number = ‘100’.
APPEND ls_claimarea to lt_claimarea.
ls_claimarea–AREA = ‘Commercial’.
ls_claimarea–number = ’50’.
APPEND ls_claimarea to lt_claimarea.
ls_claimarea–AREA = ‘Health Care’.
ls_claimarea–number = ‘150’.
APPEND ls_claimarea to lt_claimarea.
lo_nd_claimarea->bind_table( new_items = lt_claimarea set_initial_elements = abap_true ).
endmethod.
Explanation: Here we have 4 different type of lines of business and we have initialized the node with number of claims Each Area contains.
Step 5:
Let’s Move to Flash Builder now .Go to src folder and start editing your mxml file. (This is the file where we going to write a code to develop Pie chart ).
<?xml version=”1.0″ encoding=”utf-8″?>
<mx:Application xmlns:mx=”http://www.adobe.com/2006/mxml” layout=”vertical”
width=”100%” height=”100%” initialize=”initApp()”
backgroundColor=”#eaf1f6”
>
<mx:Metadata>
[Event(type=“com.flexblog.examples.events.CustomEvent”, name=“dataLoaded”)]
</mx:Metadata>
<mx:Script>
<![CDATA[
import com.flexblog.examples.events.CustomEvent;
import mx.collections.ArrayCollection;
import mx.graphics.IFill;
import mx.graphics.SolidColor;
import mx.rpc.soap.SOAPFault;
import sap.FlashIsland;
[Bindable]
public
var claimArea:ArrayCollection;
[Bindable]
public
var number:String;
[Bindable]
public
var area:String;
public
function initApp():void
{
FlashIsland.register(this);
}
]]>
</mx:Script>
<mx:Panel title=”Pie Chart“>
<mx:PieChart id=”PieChart”
dataProvider=”{claimArea}”
showDataTips=”true“
>
<mx:series>
<mx:PieSeries
field=”{number}”
nameField=”{area}”
labelPosition=”callout“
/>
</mx:series>
</mx:PieChart>
<mx:Legend dataProvider=”{claimArea}“/>
</mx:Panel>
</mx:Application>
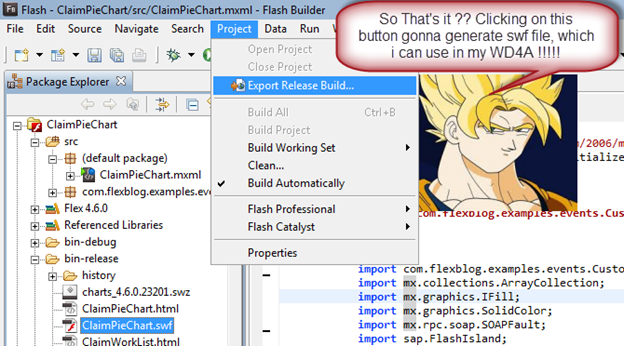
So as The Great Goku Says (if you don’t know this guy your childhood was not awesome J ) Save this file to your computer ( Here its ClaimPieChart.swf ) which we import as MIME object in our WD4A component.
Step 6:
Get back to your webdynpro for ABAP component and in the main view:
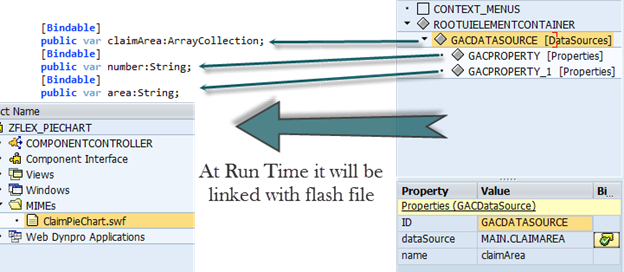
Swap the RootUIelementContainer with the FlashIsland and Add two properties one for number and one for area. (make sure you bind it with the view context as well).
Step 7: Create a webdynpro for ABAP Application and call your friends to show them your first flash application (If it works J )

