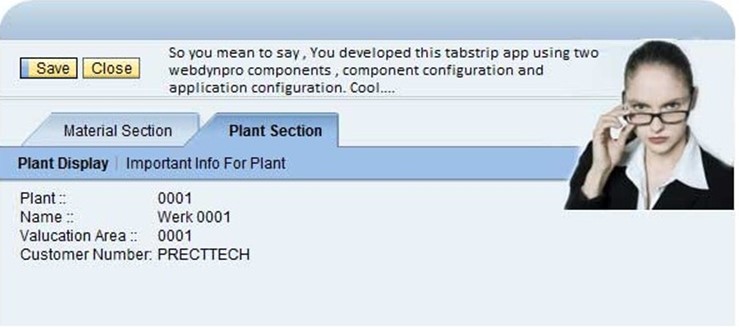
“Floor Plan manager” one of the Hot discussion topic in Webdynpro for ABAP.
What is the need of floor plan manager if we already have webdynpro for ABAP ?
There are two factors : 1. UI guidelines
Normally Client uses many application some of them developed in the webdynpro for JAVA , some in Webdynpro for ABAP and some in CRM etc..etc…Client will be seeing all different types of layout , To avoid this UI guidelines are prepared .Which helps developer to develop unified UI like: Button position ,Use of standard buttons like SAVE , EDIT , CLOSE on most of the screen.
Second thing is UI accessibility :
To make a business application available to those users who are dependent on technical support of various kinds due to disability like blind persons.
(Example : when you assign label to input field in webdynpro for abap ,when user uses tab key to come on that field , system will read the field name for user so he/she can enter proper values in it)
Combining these two concepts we got Floor plan manager to give unified look and feel.
There are major three kind of FPM application you can create.
OIF : Object instance floor plan (QAF : Quick Activity Floor plan ,is younger bro of OIF )
GAF: Guided activity floor plan
All these are used for developing different types of application.
Let’s say you want to develop a big application which provides the details of various areas with tabstrip control something like :
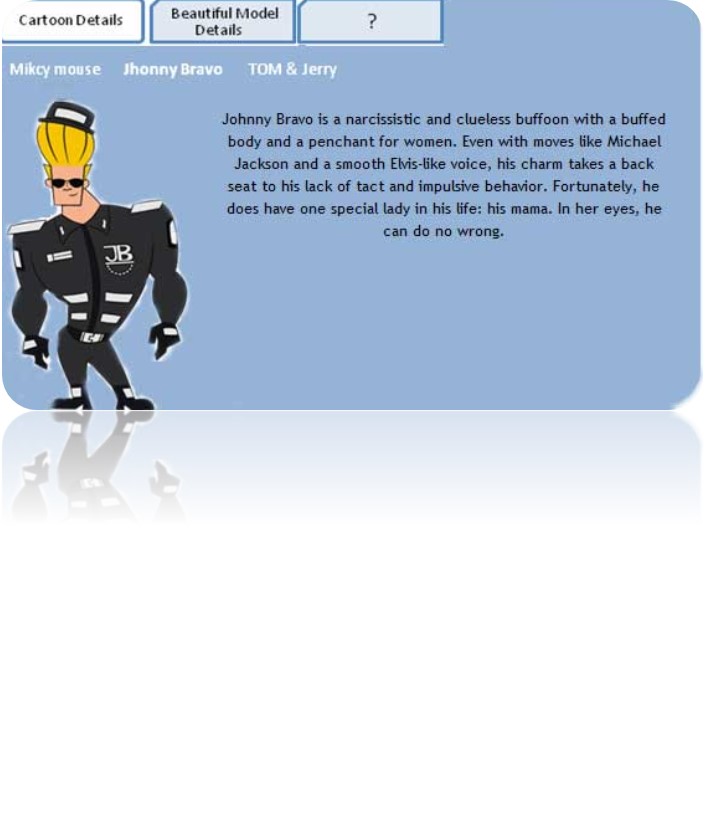
You can very well achieve this using Webdynpro for abap using tabstrip UI element , But FPM’s OIF makes it Eassssssyyyyyyyy J.
FPM is nothing but a floor where you keep your webdynpro for abap components and combine them to make a unified UI application.
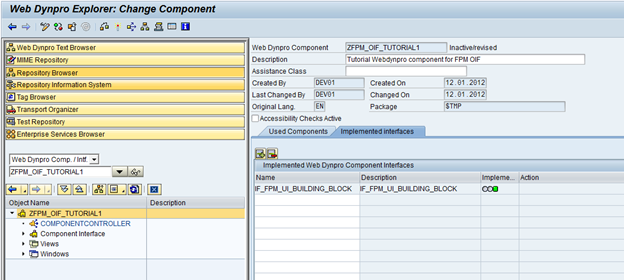
To allow Webdynpro for abap component to participate in the FPM building it must implement the IF_FPM_UI_BUILDING_BLOCK interface.
So let’s create a simple OIF application to Display two section with material and plant.Inside the material Section : material Detail, Important info .
Incase of plant section will display plant and important info.
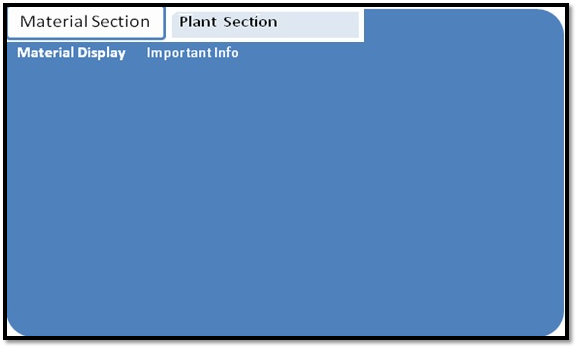
- One Webdynpro component for material section with two views: ( one for material Display , one for important info )
- One Webdynpro component for plant section with two views ( One for plant Display , One for important info )
- Component configuration: which will combine the above two components to display it in tab strip style.
- Application configuration to execute the above component configuration.
Step 1.1:
Create A simple Webdynpro for ABAP Component and put IF_FPM_UI_BUILDING_BLOCK interface and re-Implement it.
Step 1.2
Go to component controller and create a node ND_MARA for MARA and add the fields from the structure. To pre-fill the value into this node will use the supply function.( you can create the supply function by entering the name into Component controller’s Context, node attribute )
Below screenshot shows the code which you can use inside your supply function.
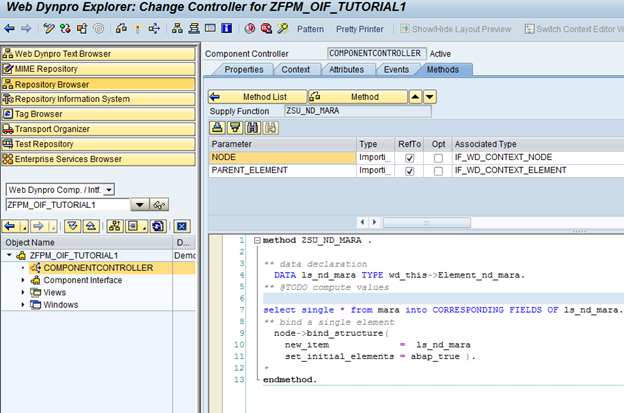
** data declaration
DATA ls_nd_mara TYPE wd_this->Element_nd_mara.
** @TODO compute values
select single * from mara into CORRESPONDING FIELDS OF ls_nd_mara.
** bind a single element
node->bind_structure(
new_item = ls_nd_mara
set_initial_elements = abap_true ).
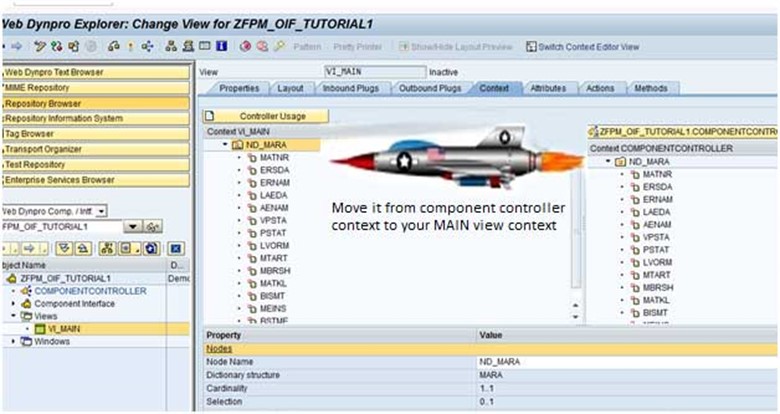
Now: Drag that ND_MARA Node to the main View.
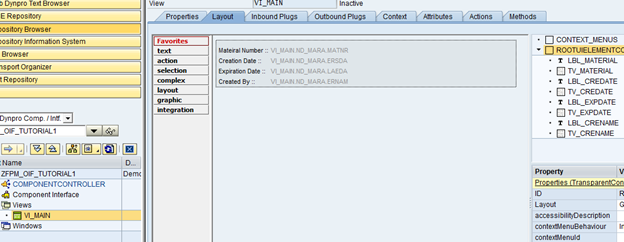
Go to Layout and create 3-4 input fields and label for the same Displaying material , Creation Date , Created By and etc..and map them with the node fields.
Step 1.3
Create one more view (VI_IMPINFO_MAT ) , which will be used to Display the Important info .Here I have used a simple Caption UI element.
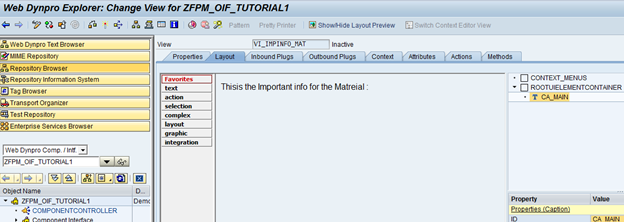
Create a Window ( WI_IMPINFO_MAT ) and include the created view ( VI_IMPINFO_MAT )inside this.SO now you can see two views and two windows in your webdynpro for abap component.
We need to keep all the views in the separate window which u want to include in FPM because u cant include views directly in the FPM.
Save and Activate All.
Step 2.1 :
Same way will create one more webdynpro component ZFPM_OIF_TUTORIAL2 for plant section. Repeat the same steps from 1.1 to 1.3
Crating Plant Section and two views , Two windows .Use table T001W for the plant.
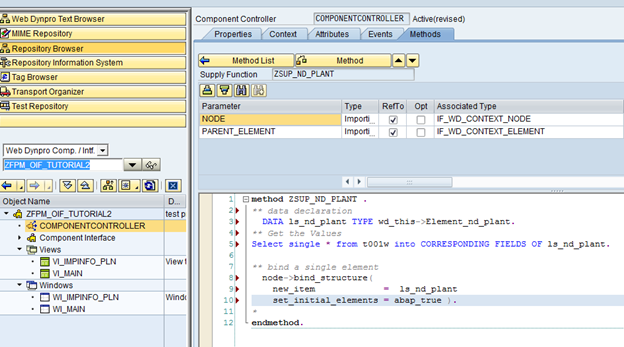
Supply function:
** data declaration
DATA ls_nd_plant TYPE wd_this->Element_nd_plant.
** Get the Values
Select single * from t001w into CORRESPONDING FIELDS OF ls_nd_plant.
** bind a single element
node->bind_structure(
new_item = ls_nd_plant
set_initial_elements = abap_true ).
This is how your second webdynpro component will look like same as first one.
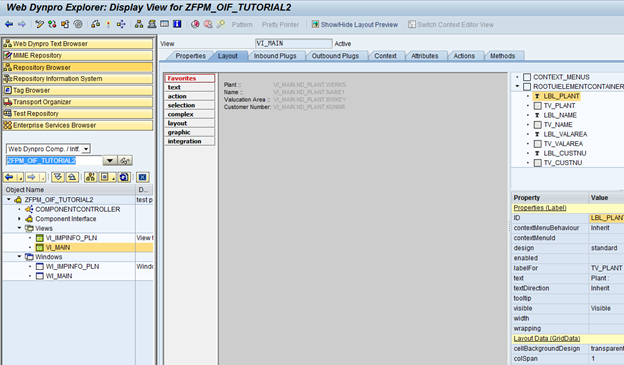
So till now we are done with the creation of two separate webdynpro for abap components .now it’s the time to make these
two components together. Will use component configuration and application configuration for that.
Step 3.1
From this step onwards floor plan manger’s work starts. We have different types of standard component available to create various look and feel .Here we are looking to create something related to tab strip.
So here we can use OIF concept.
Go to SE80 open webdynpro component FPM_OIF_COMPONENT. And create an Application named: ZFPM_OIF_DEMOAPP1
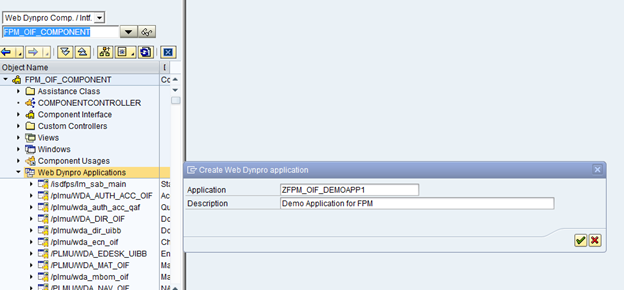
Save it and refresh the Object using refresh icon.You can see your application.
Right Click on the Application you have created and select “Select/change Configuration”
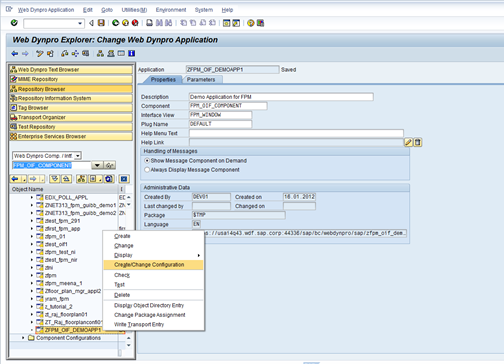
It will open up internet window where you can provide the application configuration ID. ZFPM_OIF_DEMOAPP1_APC01

Click on create Button, SAVE it on Local Object.
Step 3.2
When you save it, It will ask for the component configuration as in the below screen shot.
Provide the name as: ZFPM_OIF_DEMOAPP1_CC01.
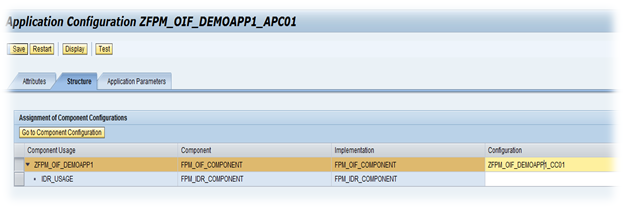
Explanation: what the above step will do it ? It will map the component configuration ZFPM_OIF_DEMOAPP1_CC01 with the current application configuration.
If you see the second line in component Usage, IDR_USAGE. It’s used for the Top banner.Called Identification region.
Check out the article ********************* To know about
IDR_USAGE.
Now click on the Button “Go to Component Configuration” (if you can’t see It active press ENTER)
It will open up a new window with pre-fill value. Click on the Create button to create Component configuration.

Step 4.1
You should see the below screen if you don’t Please stop chatting with your girl friend and concentrate here ….
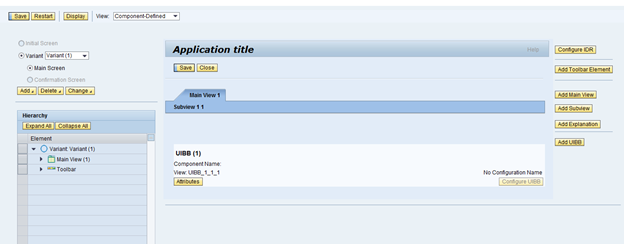
In component configuration we have something called main View and SubView.
So here for our application will create two Main Views (Material Section, Plant Section)
Now for each Main View we want to display two information (Material Display, Important Info for material) .Each Main View will contain two sub Views. You can use the side bar buttons to create Main and sub view.
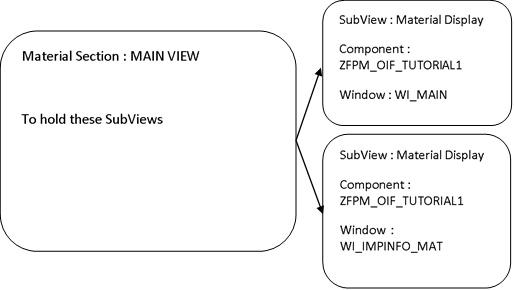
Same is the case with Plant Section:
Use the ADD main view button to add one more MAIN view and rename it as showed it in below screenshot.( PLANT_SEC )
Main View ID is just for reference and for dynamic changes. Right now you can give any name to it.
I gave MATERIAL_SEC and PLANT_SEC .
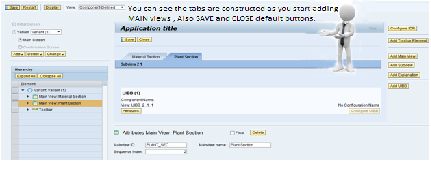
Now Let’s Add Subview to the Main View: Material Section.
You might be seeing a Default Subview available, you can rename it as
ID : MAT_DISPLAY Name : Material display
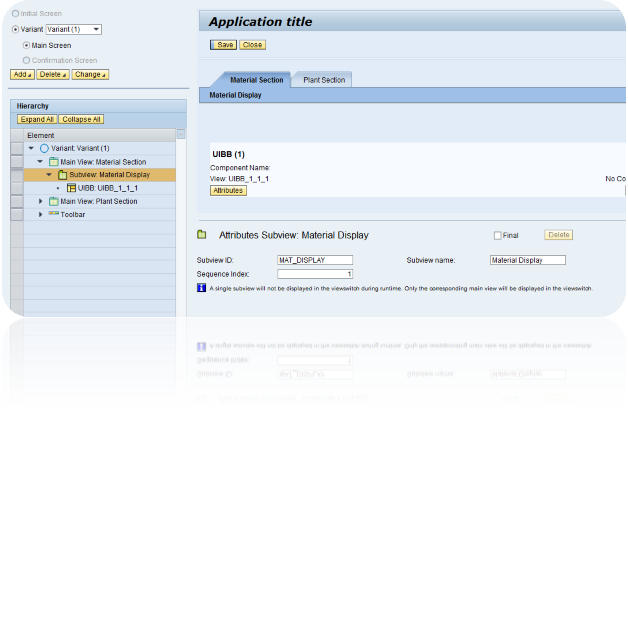
Now here is the important step:
Click on the attribute button and put your webdynpro component and Window of that component which you want to display under Material Section Main View.
Note: Make sure your webdynpro component is Active and it reimplent the interface IF_FPM_UI_BUILDING_BLOCK ( Step 1.1 )
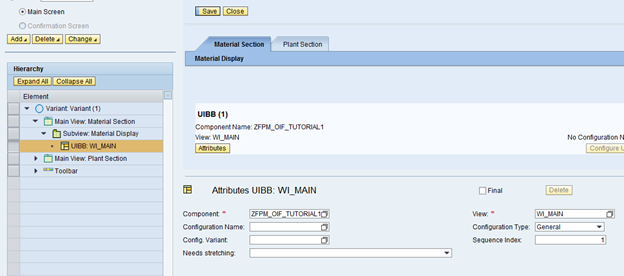
Add one more Subview using the ADD subview button, Add another window inside it.
And in the attribute component: ZFPM_OIF_TUTORIAL1 and View : WI_IMPINFO_MAT .
Step 4.2
Same repeat with the Second Main view ,
Renaming the default subview and adding one more subview.
Add the second webdynpro component and it’s Windows .
In last it will looks like as below :
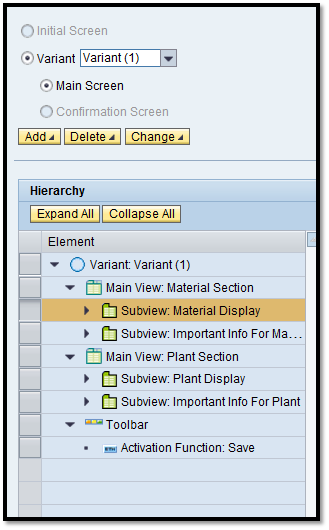
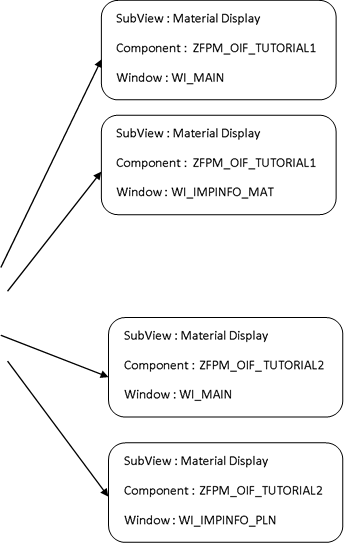
Step 4.3
SAVE the component configuration .Save the Application configuration and use the TEST Button on the application configuration to test the application.Or Go to Se80 open the application configuration you created and execute it.
NOTE : you need to run application configuration not the application.
