STEP1
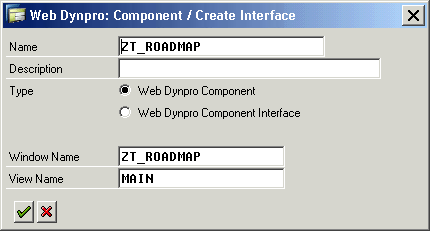
Goto SE80 and select object type as Webdynpro component/interface.
And create webdynpro component named: ZT_ROADMAP
STEP2
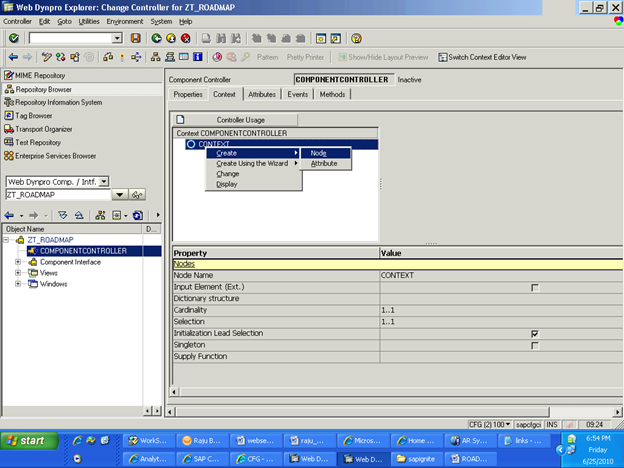
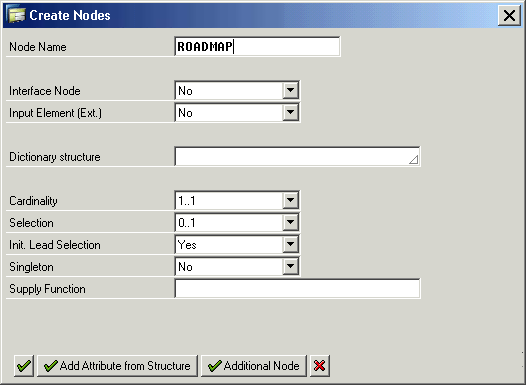
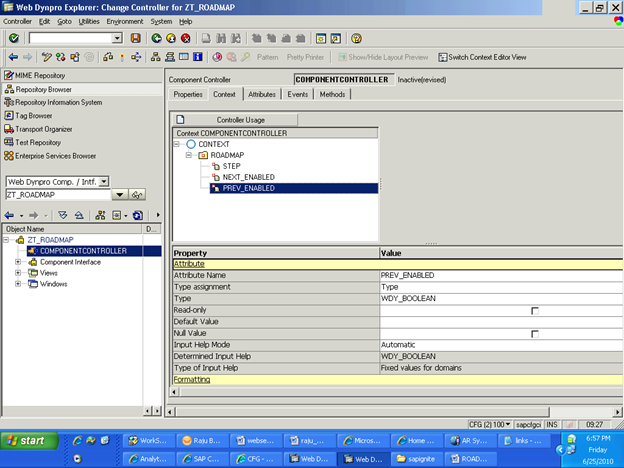
Go to component controller’s CONTEXT and create a NODE named :
ROADMAP
Step3.
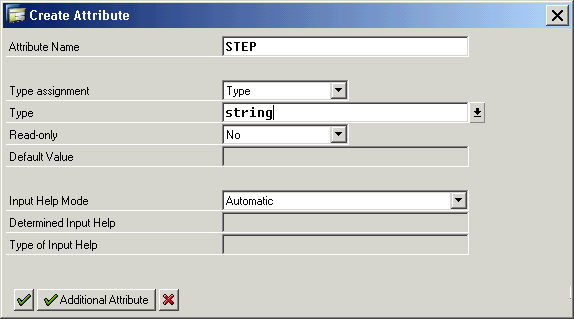
Create attributes for the ROADMAP.
STEP type STRING: while running the application it will give the step on which user is working.
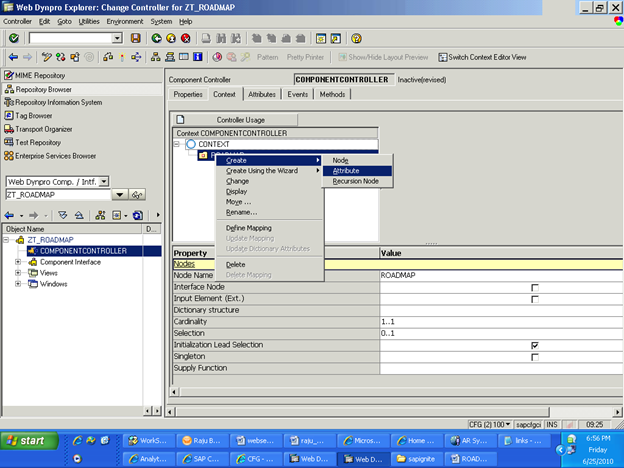
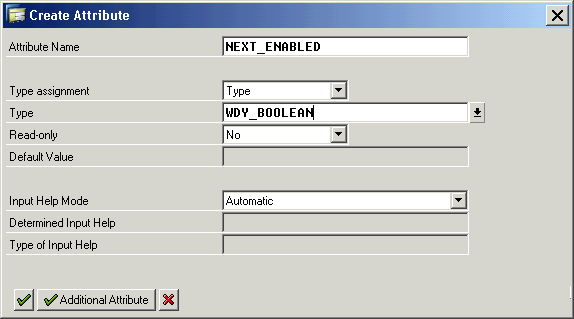
Also Create two more attributes named :
NEXT_ENABLED type WDY_BOOLEAN and PREV_ENABLED type WDY_BOOLEAN .
Step4 :
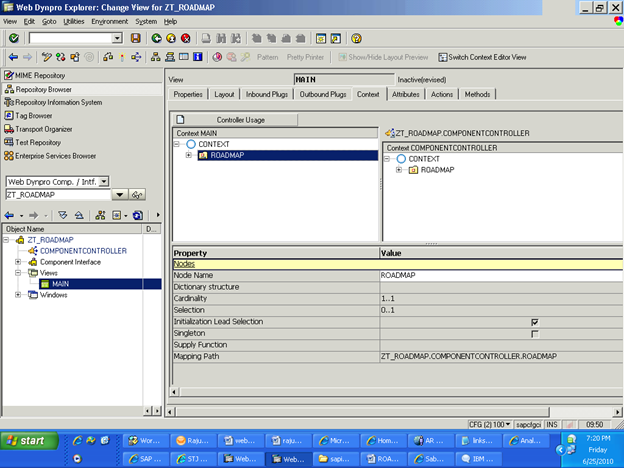
The created CONTEXT node ROADMAP is in component CONTROLLER.So this node can’t be accessed in MAIN view. we need to map this ROADMAP node to main view.
OPEN main view’s context and drag the COMPONENTCONTROLLER’s node to main view.
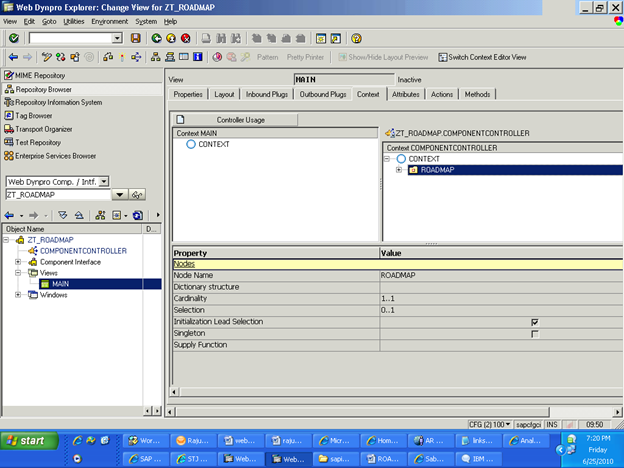
IT will look like as the below screen shot once after you mapped it.
Step5:
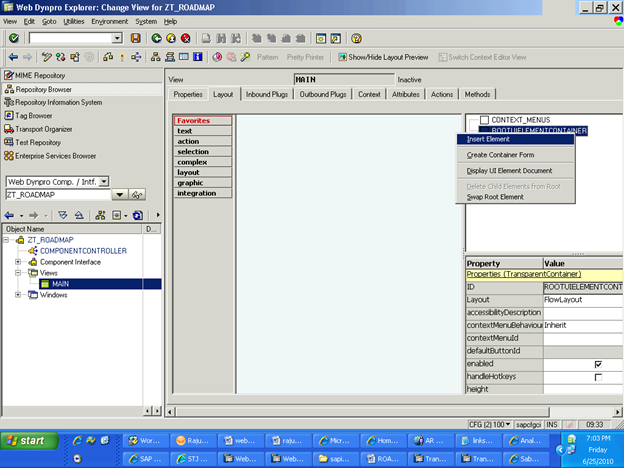
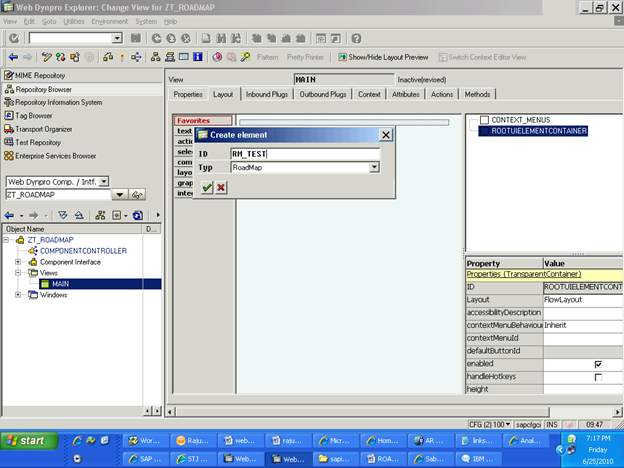
Go to the MAIN view
Right click on the ROOTUIELEMENTCONTAINER and insert Element named :
RM_TEST which is of type ROADMAP.
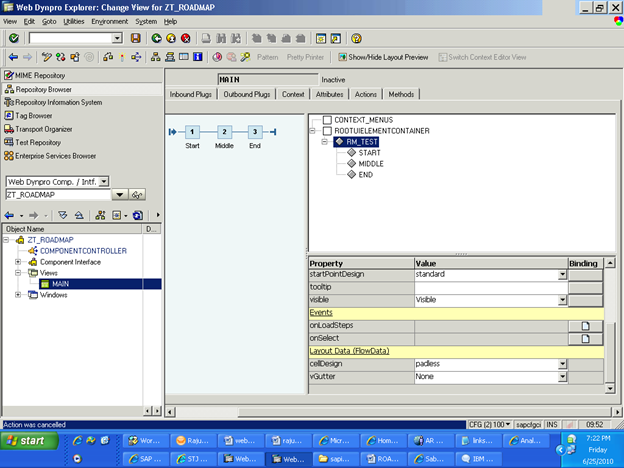
Step5.
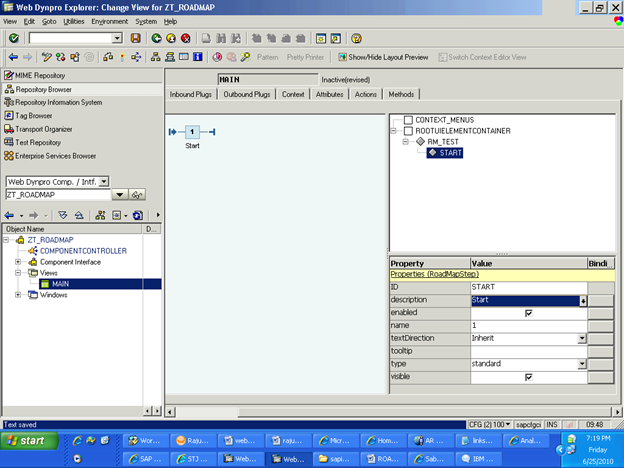
Right click on the RM_TEST (created ROADMAP) and insert Roadmap Step.
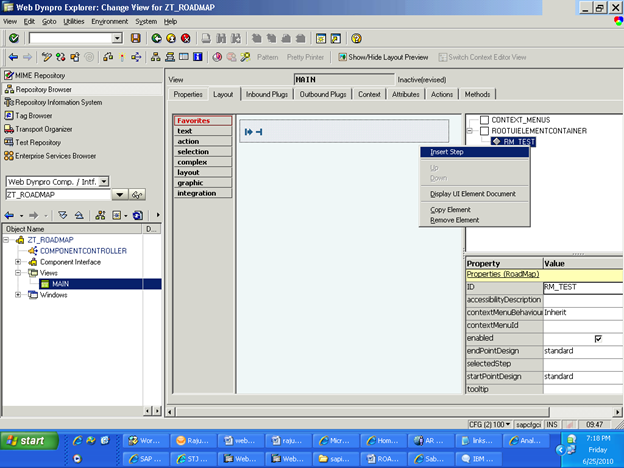
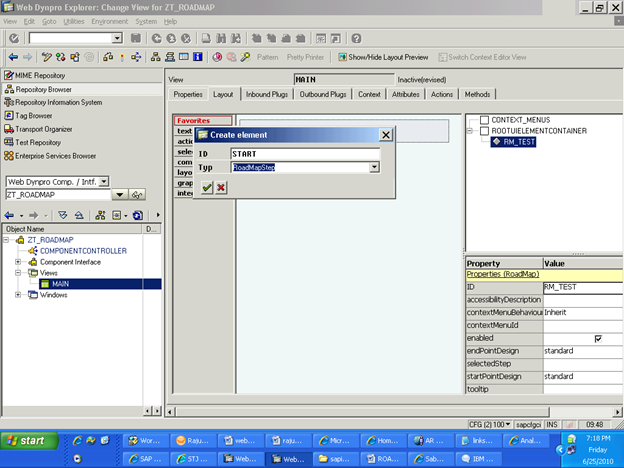
Inserted step START’s attributes are:
Description: start
Name: 1
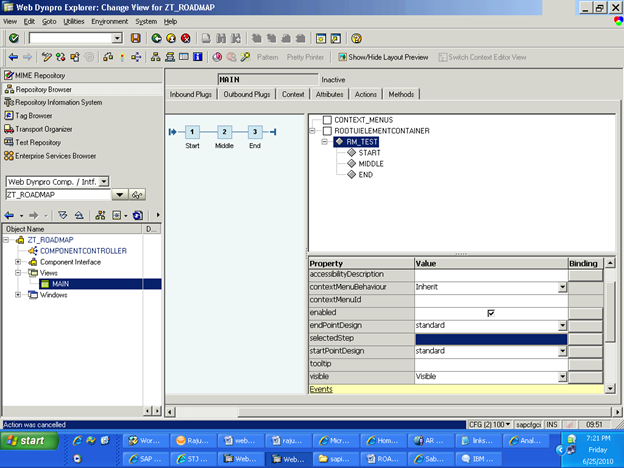
Same way insert two more steps: MIDDLE and END:
(in real time application, these steps can be “Select items” ,”select payment options”, “credit card details” and in last “Confirmation”)
Step 6:
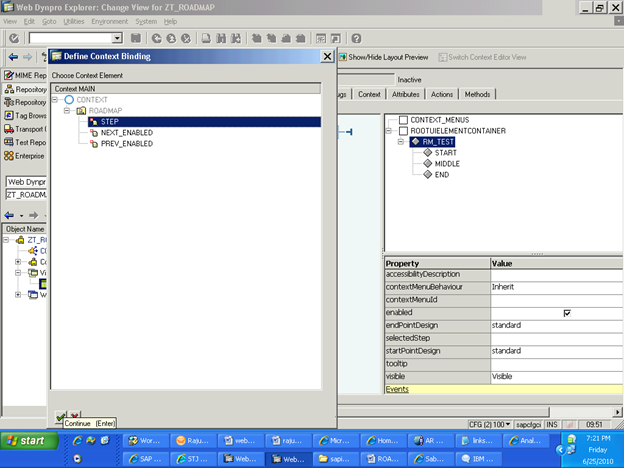
Double click on RM_TEST (road map).
Click on the Binding button for the Property: SelectedStep.
Map it with STEP Attribute.
So that when ever user select a step from the screen it’s ID will be assigned to the STEP variable of ROADMAP node.
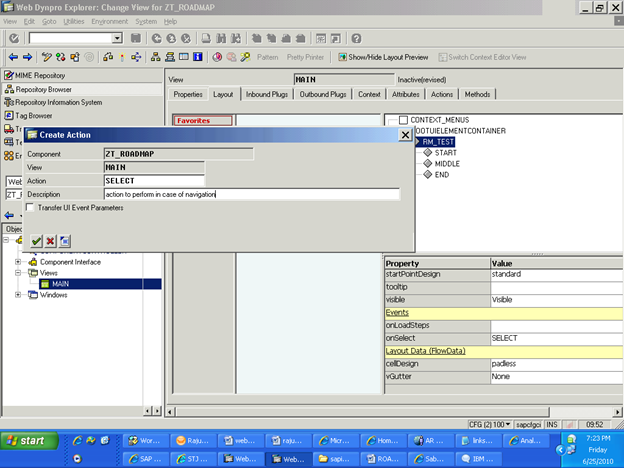
Step7:
We got the name of the step which user has selected from the screen but we need some logic so that we can display the proper view for it.
For this SELECT event of RM_TEST will be used. To create it :
Double click on the RM_TEST and in Click the button create which is there in front of OnSelect property.
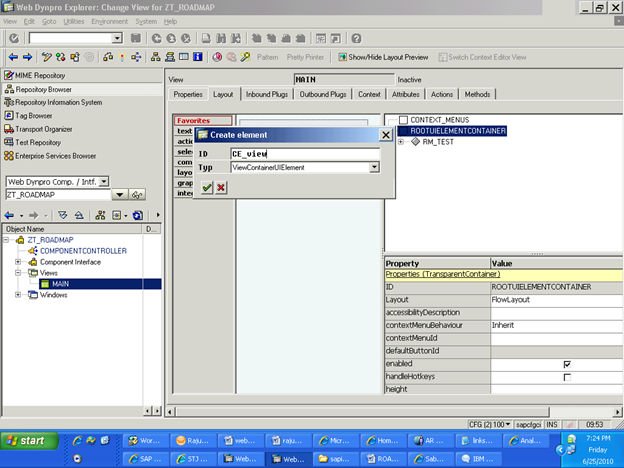
Step 8 :
Just below the ROADMAP we also need proper view according to user click.
As an example when user select “Credit card details”- step. it should display the view which has the relevant information.
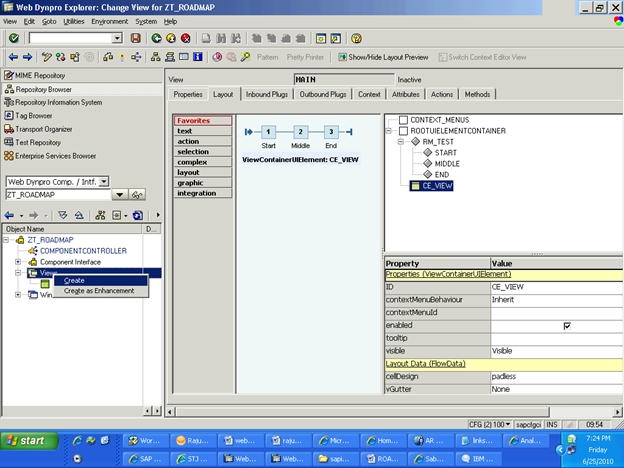
VIEWCONTAINERUIELEMENT is use for this which can contain view at run time depending on the user click.
Step9:
For this tutorial we will create 3 views START MIDDLE and END.
Right click on the VIEWS and create a view named START.
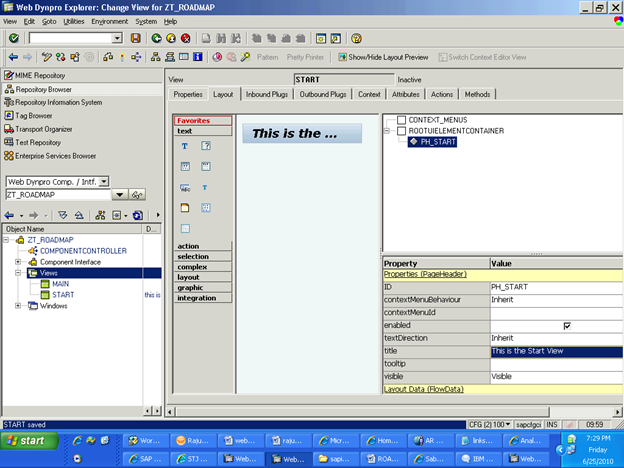
This view will be displayed on the first step: To distinguish between other view create a page header,
Right click on the ROOTUIELEMENTCONTAINER and create PH_START of type page header.
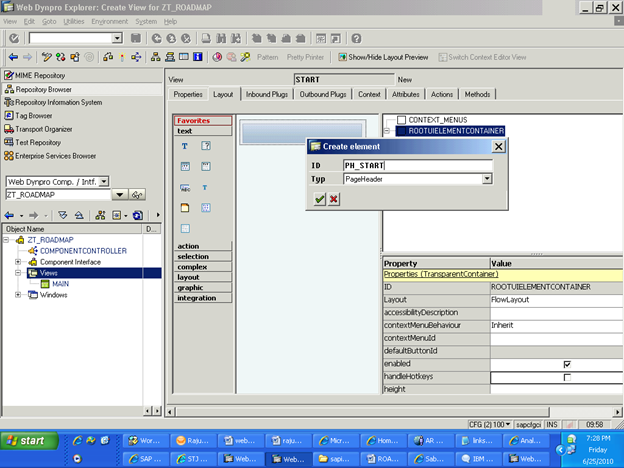
Double click on the PH_START and add some text like “This is the start view ” into the title Property.
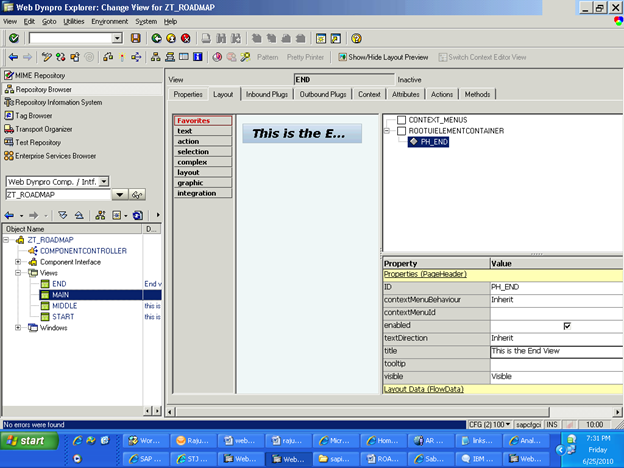
Same way create two more views MIDDLE and END.
Step10 :
To connect MAIN view with other three views START ,MIDDLE and END. we need navigation plugs from main.
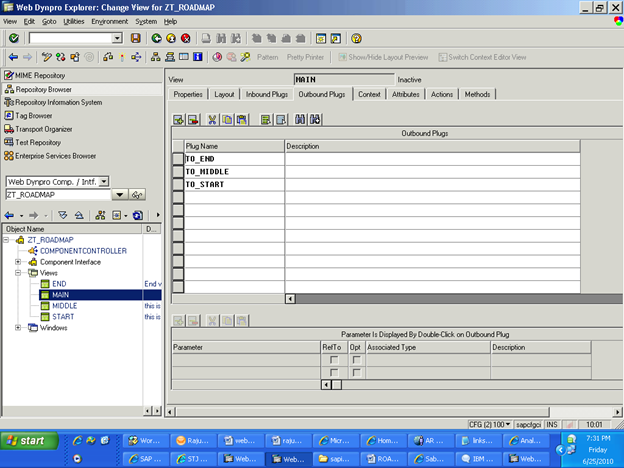
Click on the MAIN view go to its Outbound plug and create three plugs.
TO_END
TO_MIDDLE
TO_START.
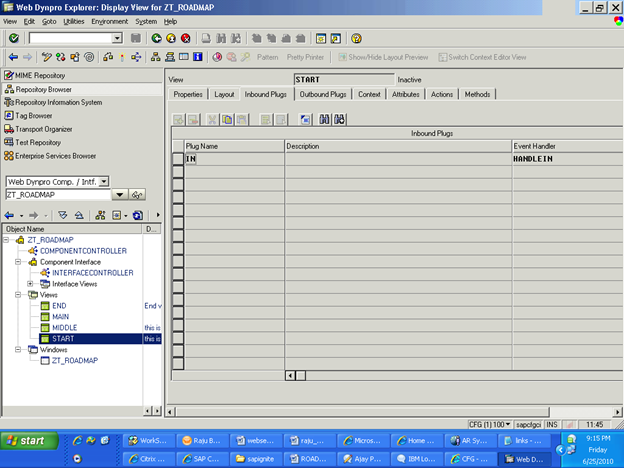
Step11:
Now go to START view and create an inbound plug.
Named: IN
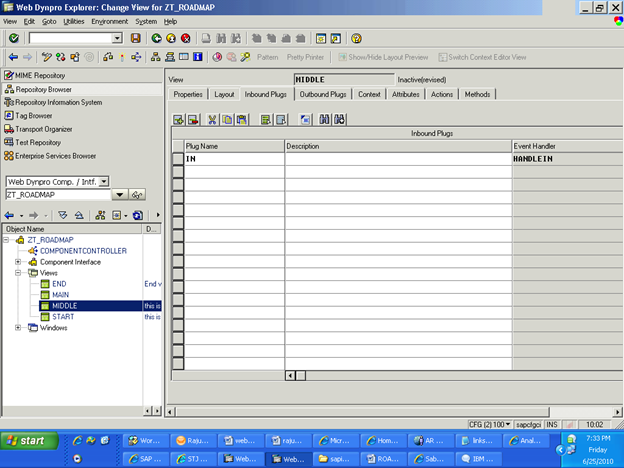
Do the same thing for MIDDLE and END view
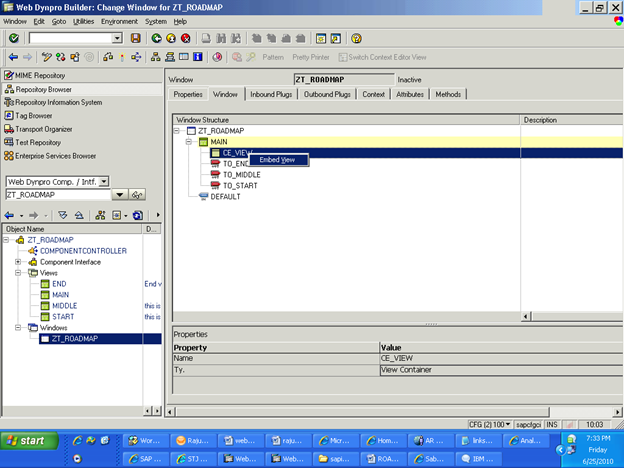
Step12 :
Now go to windows and embed the view which you have created.
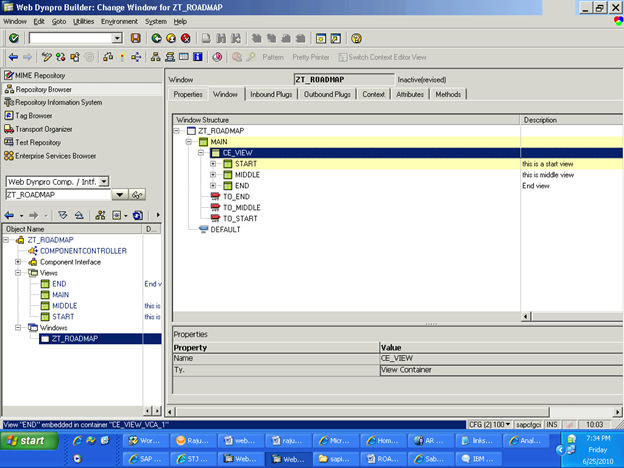
Right click on the CE_VIEW and embed the views
START , MIDDLE and END.
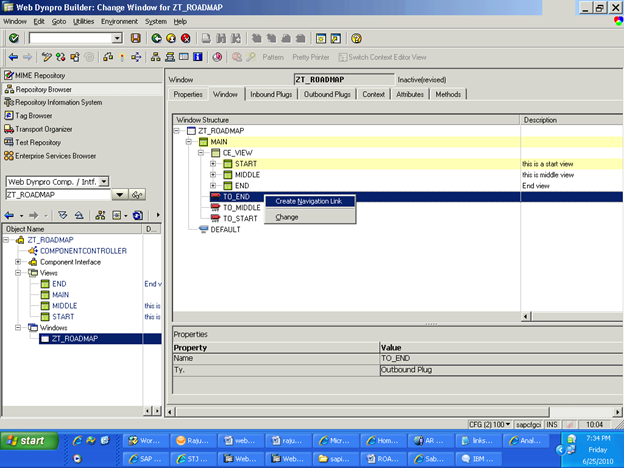
Step13:
Now main view needs to be connected with the START, MIDDLE and END view.
To do this right click on the TO_END plug and click on the “create navigation link”
And select END view for it.
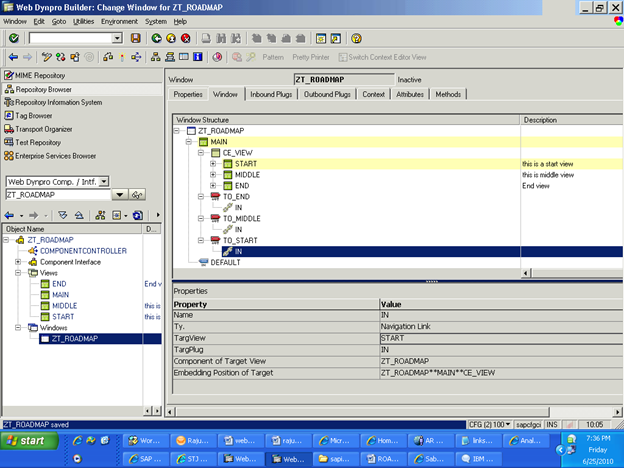
Same way create a navigation link for the other two plugs,.
Make sure that TO_MIDDLE connects with MIDDLE view
TO_START connects with START view
Step14:
Let’s also put two buttons so that user can go back or continue to the next step.
Right click on the ROOTUIELEMENTCONTAINER and create BR_NAVIGATE of type BUTTONROW.
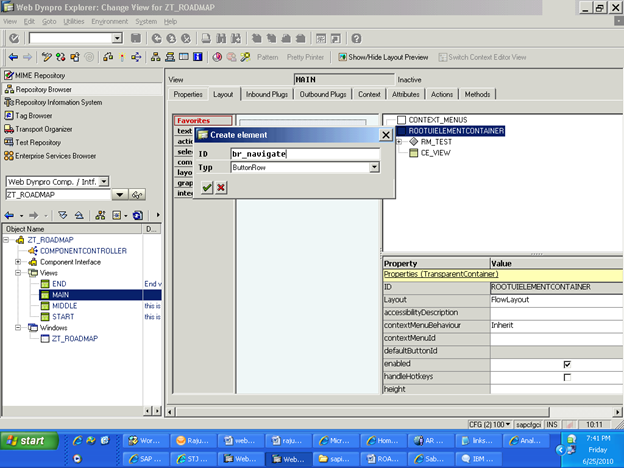
We will put two buttons in single row.
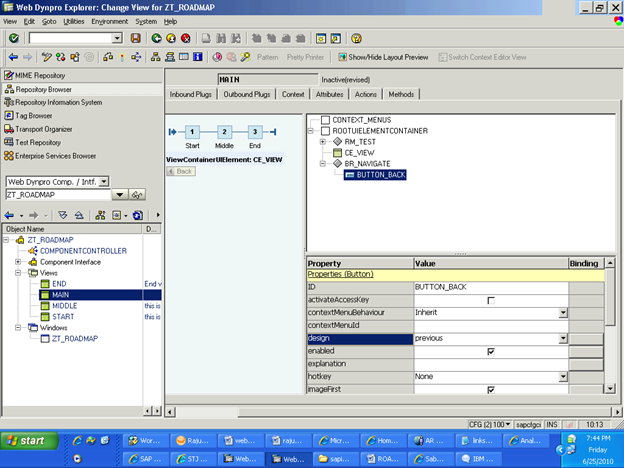
Right click on the BR_NAVIGATE button row and create BUTTON_BACK of type BUTTON.
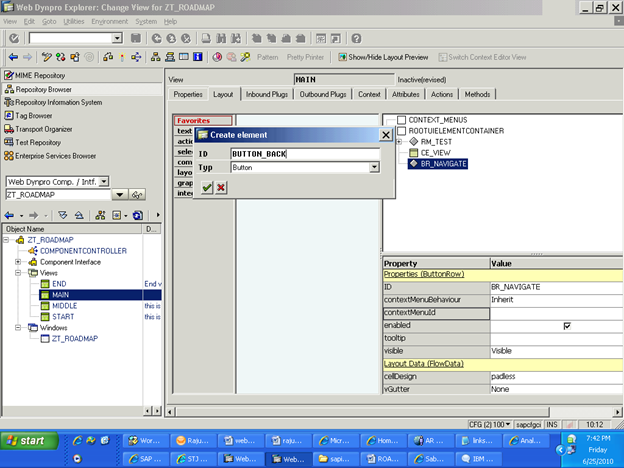
Double click on the BUTTON_BACK and change its property Design as PREVIOUS:
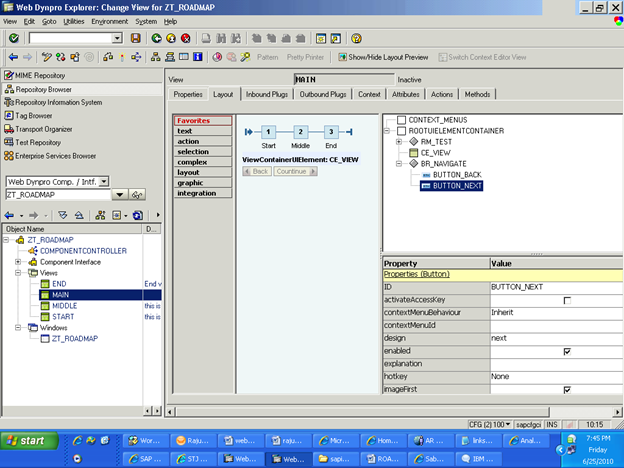
Same way create button BUTTON_NEXT in BR_NAVIGATE.
And change its design property as NEXT.
(Refer below screen shot)
Step 15:
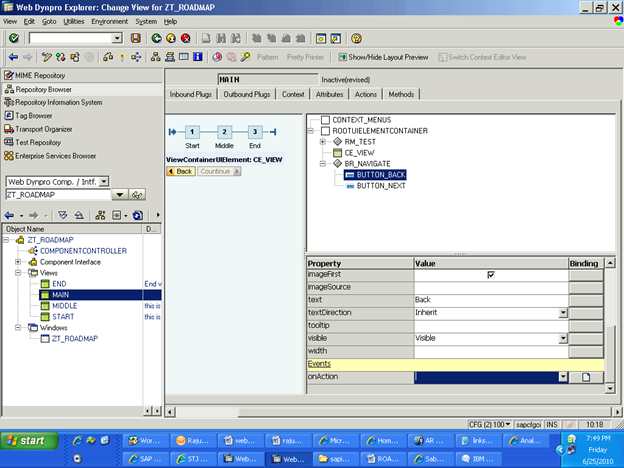
On click of the back button ROADMAP should navigate to the previous step. To achieve this:
Create an action named: PREVIOUS on BUTTON_BACK.
(Double click on BUTTON_BACK and click on the create ICON for PROPERY “ONACTION”)

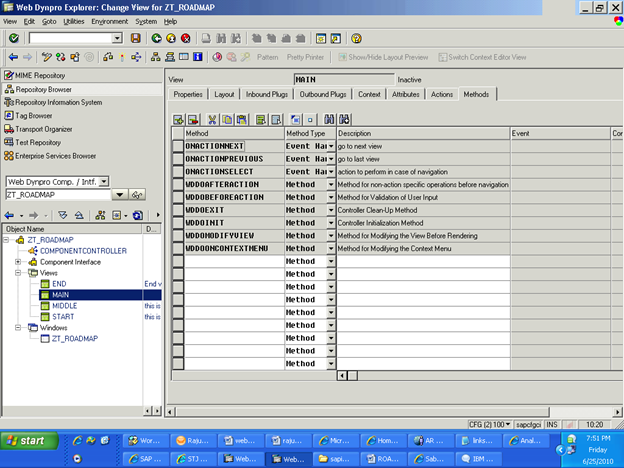
Same way create Action named: NEXT for the BUTTON_NEXT
SAVE the changes:
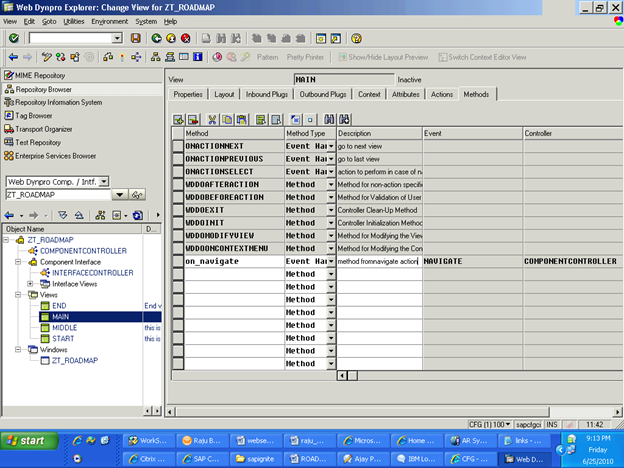
When you create actions it will internally create respective methods for it.
You can see the below screen shot with your created methods ONACTIONNEXT and ONACTIONPREVIOUS.
Step16:
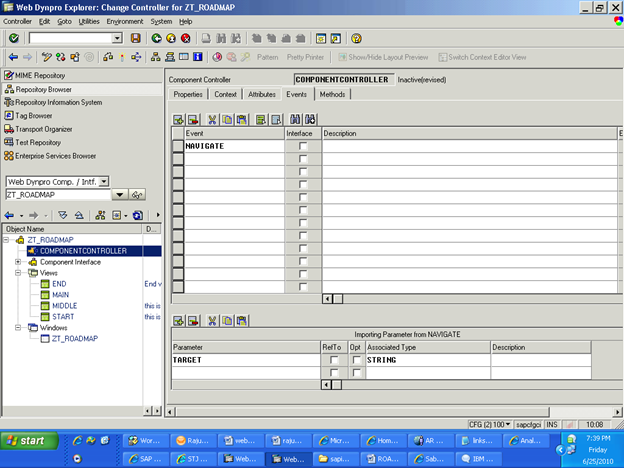
GO to your component controller and in EVENT tab create an event
NAVIGATE with parameter TARGET which is of type string.
(Use of this event will be explained after wards)
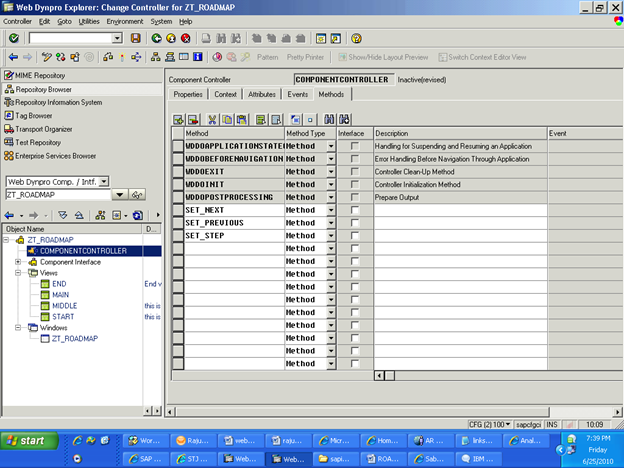
It is good practice to put all your core methods in to component controller as COMPONENTCONTROLLER can be accessed from every view:
Go to methods tab and create three methods:
SET_NEXT : will be used when user click back button
SET_PREVIOUS : will be used when user click on the Continue button
SET_STEP : will be used to jump to a particular step
Step17:
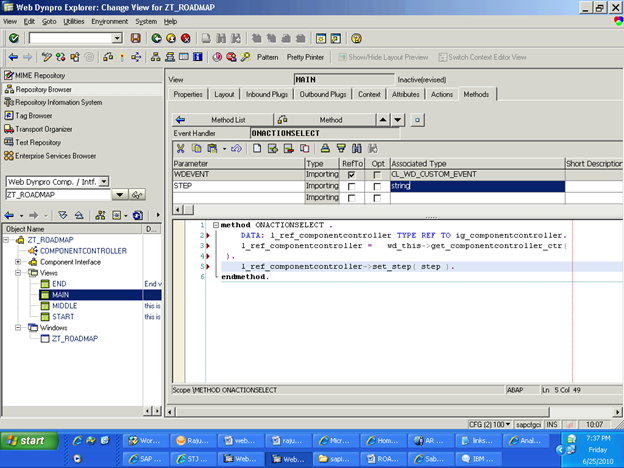
Go to main view and in method tab select method ONACTIONSELECT (which is created by action which we have defined for the ROADMAP)
Add one parameter named STEP of type string.
Add the below code :
Here we are calling the SET_STEP method of the component controller
DATA: l_ref_componentcontroller TYPE REF TO ig_componentcontroller.
l_ref_componentcontroller = wd_this->get_componentcontroller_ctr( ).
l_ref_componentcontroller->set_step( step ).
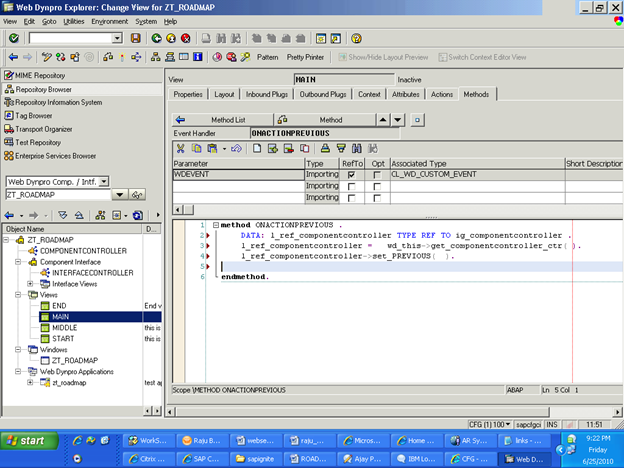
Same way in ONACTIONPREVIOUS method of MAIN view (which is called by clicking the BACK button)
In previous method put the below code:
DATA: l_ref_componentcontroller TYPE REF TO ig_componentcontroller .
l_ref_componentcontroller = wd_this->get_componentcontroller_ctr( ).
l_ref_componentcontroller->set_PREVIOUS( ).
Same way in ONCATIONNEXT Method of the MAIN view put the below code:
DATA: l_ref_componentcontroller TYPE REF TO ig_componentcontroller .
l_ref_componentcontroller = wd_this->get_componentcontroller_ctr( ).
l_ref_componentcontroller->set_next( ).
Step18:
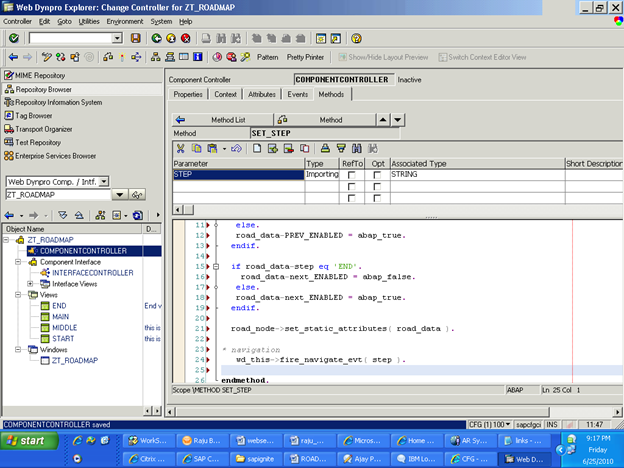
Go to component controller and open method SET_STEP which we have created in earlier steps.
Add one more parameter name as STEP of type string.
Add the below code into this method (this code is used to highlight the current STEP so that user can know on which step he /she is currently on. In last it will fire an event which is created in component controller .It is indication of changing the view)
data : road_node type REF TO if_wd_context_node.
data : road_data TYPE if_componentcontroller=>element_roadmap.
road_node = wd_context->get_child_node( ‘ROADMAP’ ).
road_data-step = step.
if road_data-step eq ‘START’.
road_data-PREV_ENABLED = abap_false.
else.
road_data-PREV_ENABLED = abap_true.
endif.
if road_data-step eq ‘END’.
road_data-next_ENABLED = abap_false.
else.
road_data-next_ENABLED = abap_true.
endif.
road_node->set_static_attributes( road_data ).
* navigation
wd_this->fire_navigate_evt( step ).
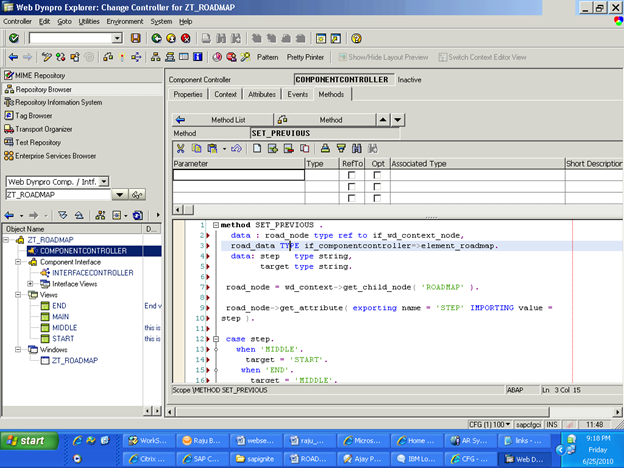
Same way open the method SET_PREVIOUS in component controller and add the below code in it.
data : road_node type ref to if_wd_context_node,
road_data TYPE if_componentcontroller=>element_roadmap.
data: step type string,
target type string.
road_node = wd_context->get_child_node( ‘ROADMAP’ ).
road_node->get_attribute( exporting name = ‘STEP’
IMPORTING
value = step ).
case step.
when ‘MIDDLE’.
target = ‘START’.
when ‘END’.
target = ‘MIDDLE’.
When others.
target = ‘END’.
endcase.
set_step( target ).
Same do for the method SET_NEXT of component controller.
And put the below code in it.(for SET_PREVIOUS and for SET_NEXT no need for any input parameters)
data : road_node type ref to if_wd_context_node,
road_data TYPE if_componentcontroller=>element_roadmap.
data: step type string,
target type string.
road_node = wd_context->get_child_node( ‘ROADMAP’ ).
road_node->get_attribute( exporting name = ‘STEP’
IMPORTING
value = step ).
case step.
when ‘START’.
target = ‘MIDDLE’.
when ‘MIDDLE’.
target = ‘END’.
When others.
target = ‘START’.
endcase.
set_step( target ).
Step19:
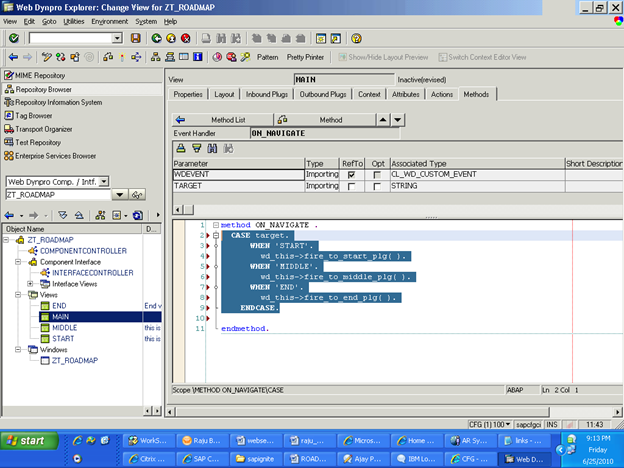
The navigate event which is fired in the component controllers SET_STEP method is handled by
ON_NAVIGATE method in the main view
So create a method ON_NAVIGATE with method type as “Event Handler” and put Event as “NAVIGATE”(you need to do F4 for it)
When you open that method you can see TARGET as import data which is come from NAVIGATE Event definition.
Put the below code inside the ON_NAVIGATE method:
CASE target.
WHEN ‘START’.
wd_this->fire_to_start_plg( ).
WHEN ‘MIDDLE’.
wd_this->fire_to_middle_plg( ).
WHEN ‘END’.
wd_this->fire_to_end_plg( ).
ENDCASE.
Step 20:
I know you are desperate to see the output (*=*) :Don’t worry This is the last step J
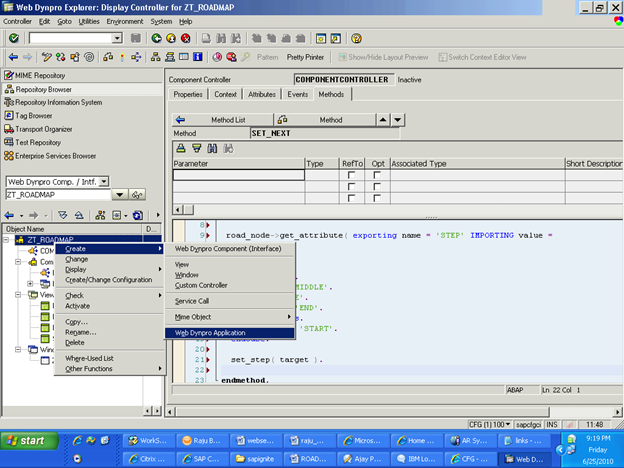
Right click on the Component ZT_ROADMAP and create webdynpro application.
Execute the application and see your hard work J : (hope you have not missed any step or did any errors)