Before we start with this article of how to create a screen EXIT have a look into the below image.
-
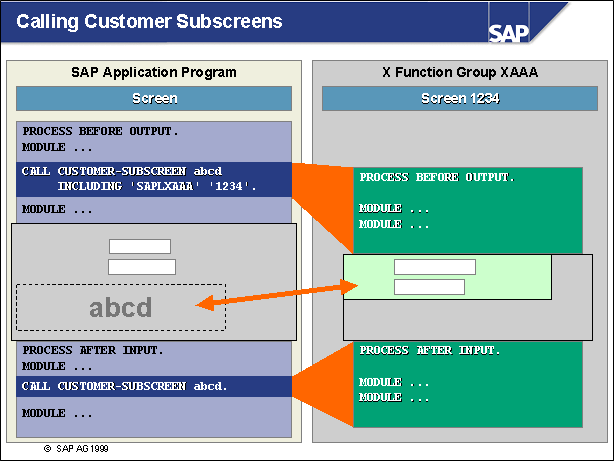
Whenever the statement CALL CUSTOMER-SUBSCREEN <area> INCLUDING <X-function-pool> <screen_number> occurs at PBO in the flow control of a screen, a subscreen is included in the subscreen area defined by SAP application programmers. At this point, all modules called during the PBO event of the subscreen are also processed.
- The PAI event of a subscreen is processed when the calling screen calls the subscreen during its PAI event using the statement CALL CUSTOMER-SUBSCREEN <area>.
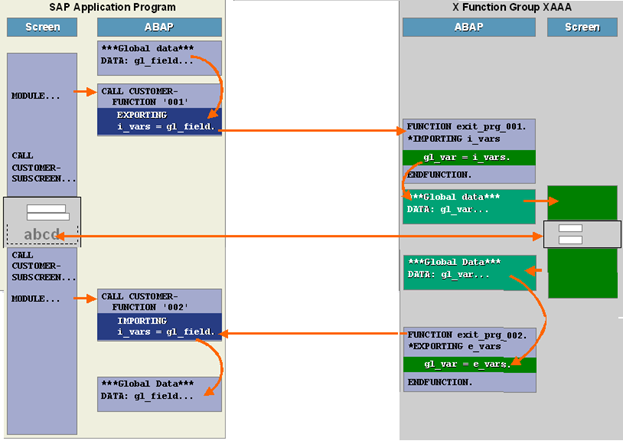
- The global data of the calling program is not known to the X function group that contains your subscreen; SAP application programmers use function module exits to explicitly provide this data to subscreens.
- In order to facilitate data transport, modules are called in the flow control of the calling program that contain function module exits for transferring data via interface parameters.
- Function modules belonging to these kinds of function module exits can be found in the same function groups as their corresponding subscreens.
- Data must be transported in the other direction as well, since global data from the X function group that contains your subscreen is not known to the calling program either. For this reason, SAP application programmers use function module exits to return any data to the calling program that was changed in the subscreen.
-
This is done by calling a module during the main screen’s PAI event that contains a function module exit for returning customer data via interface parameters.
So In simple words Screen exit also require Two function module exits to make it to stand properly.
Starting with the Practical:
Below is ME22N screen, Now the requirement is to modify it with few extra fields into item level data.

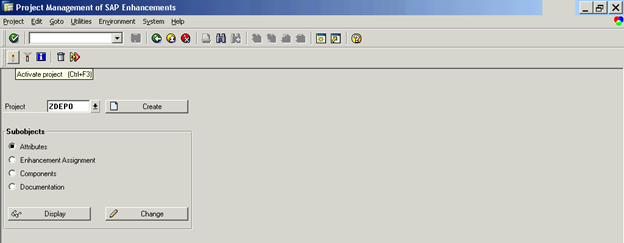
Step 1 :CMOD is the transaction code using which we can use this components
Go to Transaction code CMOD -> Enter the Project name As ZDEPO (you can give any name).
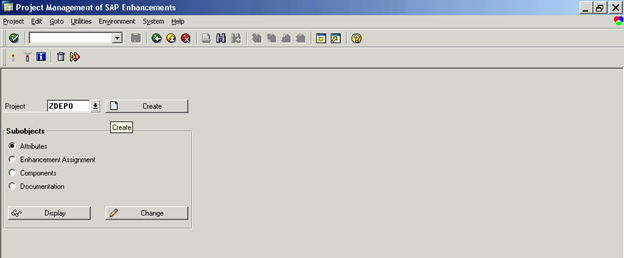
Step 2 :
Click on the button Enhancement Assignment
Include this Enhancement MM06E005 (Transaction code SMOD is used to find the proper enhancement needs to be used) Read article Enhancement in SAP to know how to find out appropriate enhancement.
We have already discussed how to find the respective component for your change.

Step 3:
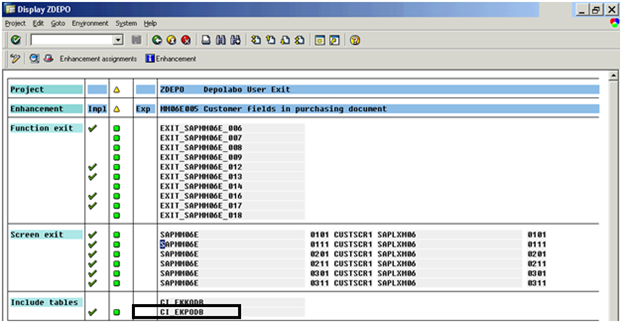
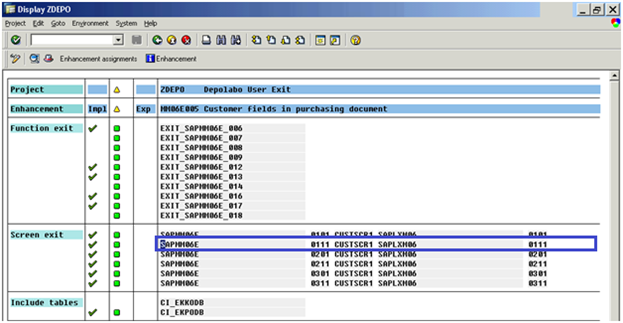
Click on Components Button.
You can see the below components into your Project:
It is having Function EXITs, Screen EXITs and few includes for the table.
As we have discussed you want to Display Extra fields into ME22N screen.
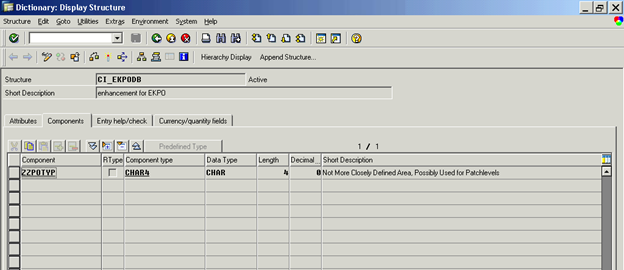
Double click on the CI_EKPODB it will take you to SE11 screen.
Step 4:
Include the field which you want to Show or enhance.
Here we have used field ZZPOTYP which is of type Char4. Save it and activate it.
(Note: it may take long time to activate as this field will be inserted into EKPO table.)
Step 5:
Click on the BACK button and go back to the below screen. Now you can design visual part of your work.
Double click on the Screen EXIT 0111.It will take to you to Screen painter Se51.
Step 6:
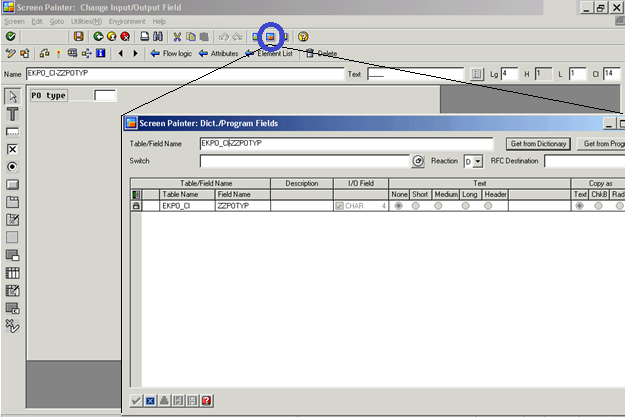
Click on the layout button in the screen. And create label and text field.
Here we are going to insert our created field ZZPOTYP.
Click on the button Dict./Program fields.
Enter the Table/Field name as: EKPO_CI-ZZPOTYP and click Get from Dictionary button.
Select that field and insert it into the screen.
Save your changes and activate this screen.
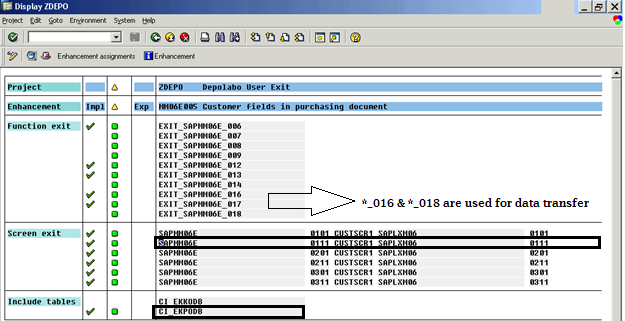
Step 7: Again go back to the below screen using back button.
Till now we have created a SCREEN. (First image of this article: Calling customer subscreen ).
Now we need to implement Two Function EXIT to transfer data to the sub screen and to read the data from the subscreen .
Here Function EXIT:
EXIT_SAPMM06E_016.–> use to transfer data to the subscreen.
EXIT_SAPMM06E_018.–> use to get the data back from the subscreen.
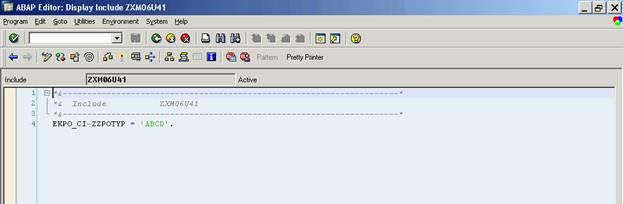
Double click in the First 016 exit it will take you to the function module, you will find one include
INCLUDE ZXM06U41.
Double click on this include and create it. Put your code to initialize the variable EKPO-ZZPOTYP here.
Step 8:
For learning purpose we have just use a single line of code to make it easy.
EKPO_CI-ZZPOTYP = ‘ABCD’.
Step 9:
Same way you can use the EXIT: EXIT_SAPMM06E_018. For reading the value if use modify it in screen.
For time being ignore this step. And Go back Again to the CMOD screen and Activate your project ZDEPO.
Step 10:
Go to transaction code ME22N open any existing PO. You can see an extra tab is added into ITEM detail
Customer Data. Which will have your new field ZZPOTYP.
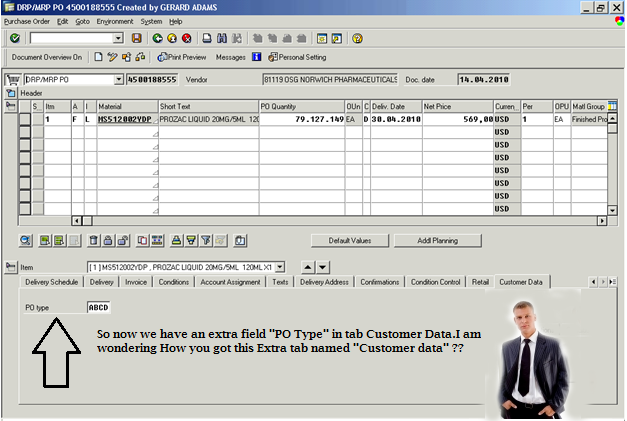
This Extra tab Customer Data is added by standard SAP code. Whenever it finds any active screen exit while execution, it will activate this tab. (Note: screen 0111 which we have used is defined under “Customer Data” tab.)