Interactive form In Adobe:
Before we start let me tell you some advantage of the Adobe forms :
- It overcomes the drawbacks of paper based forms like it prone to errors, quickly outdated and as it requires manual data entry that leads to inaccurate data.
- Forms can be filled in advance automatically with specific data from SAP applications and then sent to the correct recipients using secure methods
- Automatic consistency checks for forms
- Activate enhanced functions such as comments
- Digital signatures and form certification.
These points are enough to make your customer ready to implement Adobe forms in his SAP Systems or Migrate all the SAP Scripts and smart Forms into Adobe Forms (I know many of the Developer will not likes this who are Genius in SAP Script / Smart Forms ).
This article will cover the small tutorial about how to make a WebDynpro for ABAP Application with interactive adobe forms.
Step1 :
Go to Transaction SE80 and create a Webdynpro for ABAP Application.
Name it as ZT_RAJ_INTERACTIVE ( Note : Better you use your Girl Friend/ Boy Friend’s name to impress !!!! )
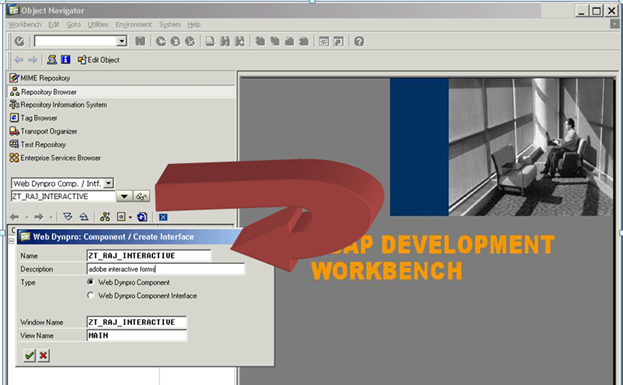
Step 2 :
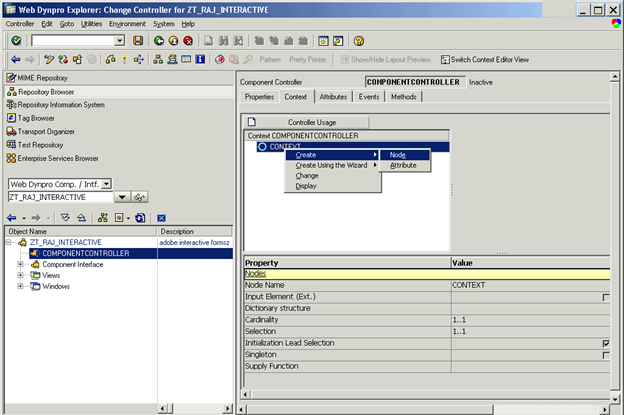
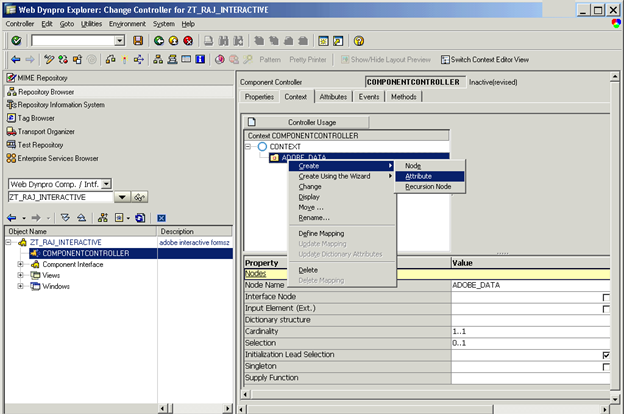
Double click on the COMPONENTCONTROLLER and go to the Context of it.
Right click on the CONTEXT and create a Node.
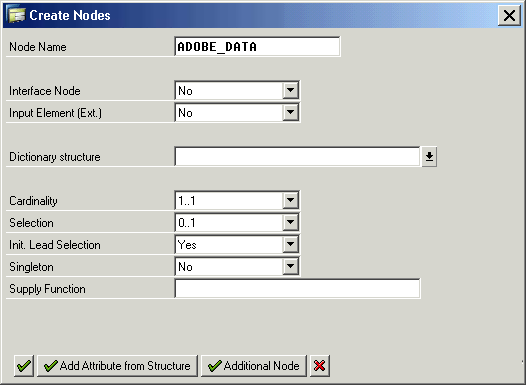
Give the name as ADOBE_DATA, As shown in the below screen Shot.
Step 3:
Right click on the Node ADOBE_DATA and create an attribute named INPUT_NO which is of type NUMC10.
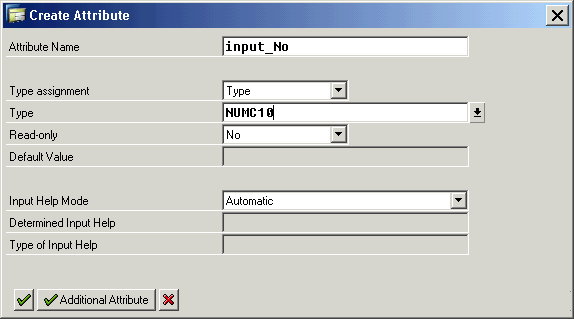
Same way create one more attribute in the same node ADOBE_DATA as OUTPUT_NO of type NUMC10.
Step 4:
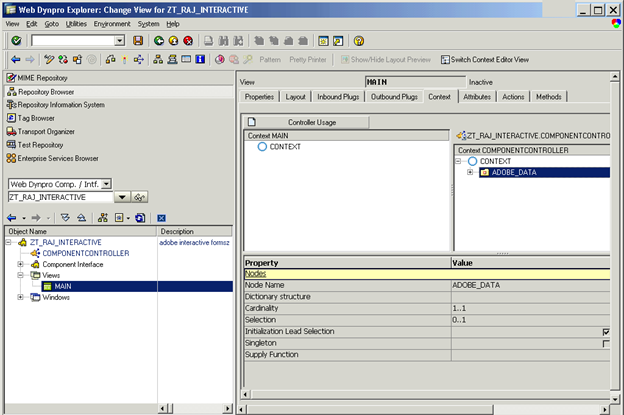
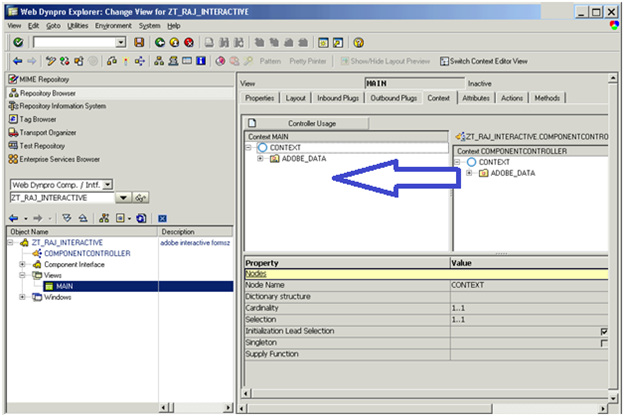
Go to the MAIN view (Double click on the MAIN view ). Drag the ADOBE_DATA from the COMPONENTCONTROLLER to the CONTEXT of your MAIN View.
(Note : it is good programming habit to declare the DATA ( NODE ) in component controller and drag it to the respective VIEW. This will help to pass that data through different views)
Step 5:
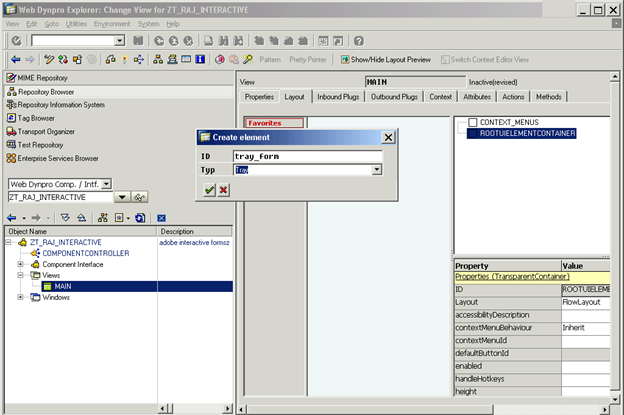
Go to Layout and Right click on the ROOTUIELEMENTCONTAINER and add an element TRAY_FORM of type tray.
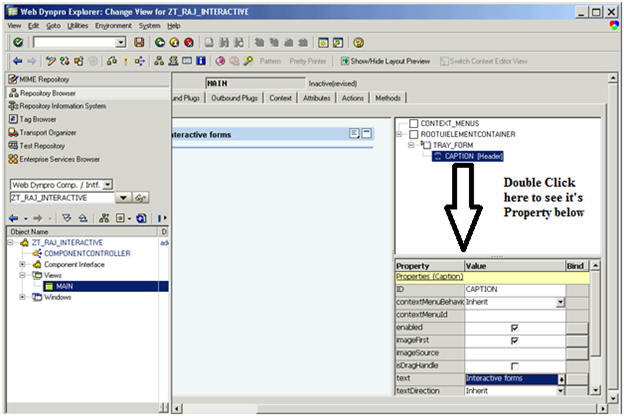
Double click on the CAPTION and give some Sweet Text like “Interactive Forms ” which you want to Display as a header on Tray.
Step 6:
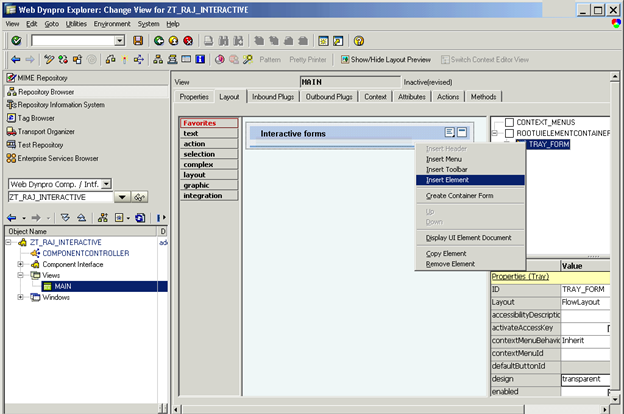
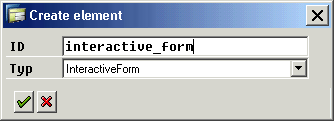
Right click on the Tray you have created and Insert an Element Called INTERACTIVEFORM.
Give a name as INTERACTIVE_FORM.
Step 7 :
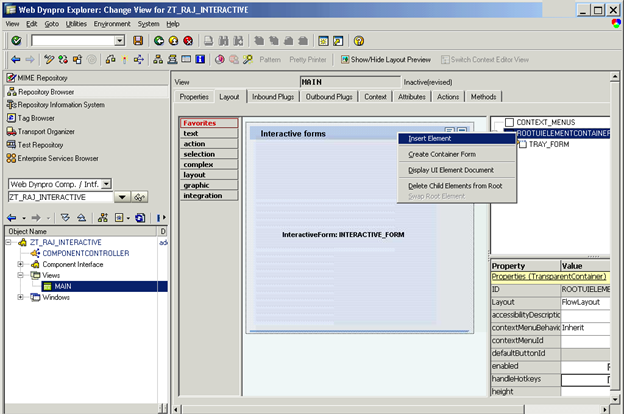
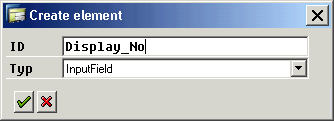
Right click on the ROOTUIELEMENTCONTAINER and Inert Element named Display_no which is of type INPUTFIELD.
Step 8:
This DISPLAY_NO will be used to display the Number which you enter inside the Form.
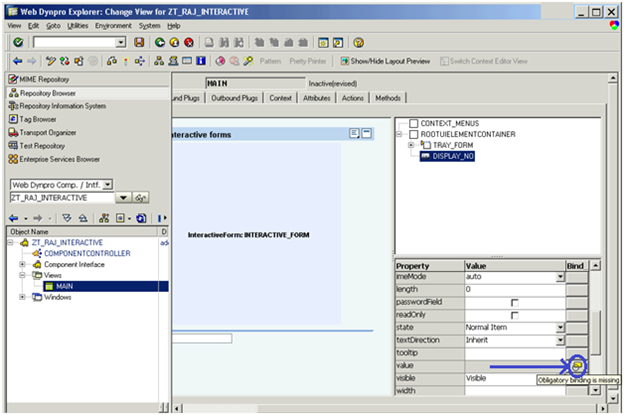
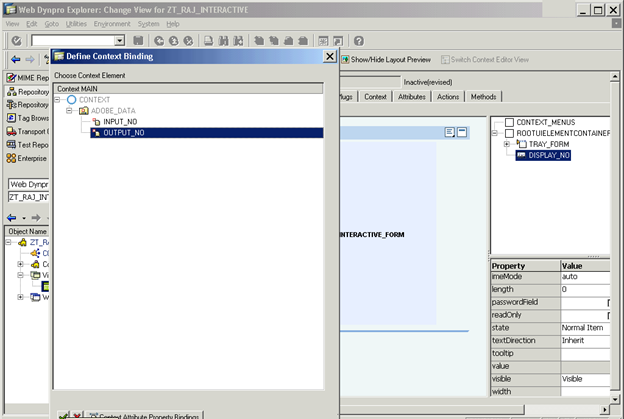
To do this we need to bind this with OUTPUT_NO of our MAIN view’s context.
Double click on the DISPLAY_NO UI element and click on the Binding Property of it.
Select the OUTPUT_NO and click ENTER.
Step 9:
Double click on the INTERACTIVE_FORM.
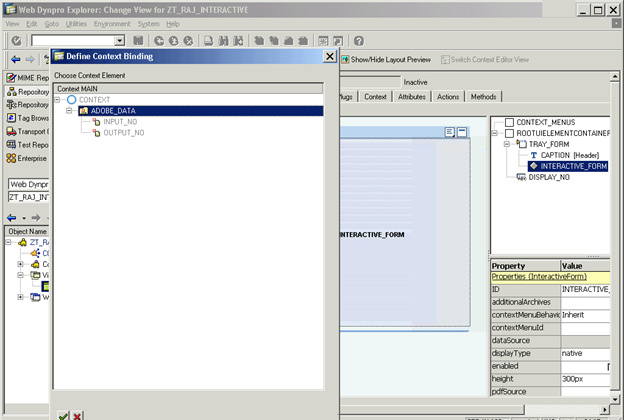
Select the Property “DATA Source” and click it’s right side button to give the data source for our form.
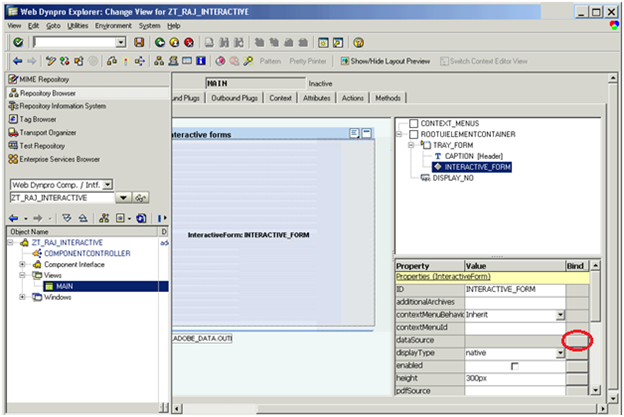
Select the ADOBE_DATA Node and select ENTER Button.
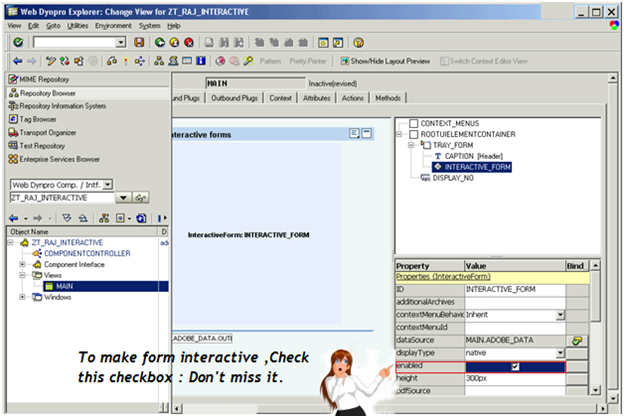
Also Check the enabled check Box for it. It requires to make the ADOBE Forms interactive.
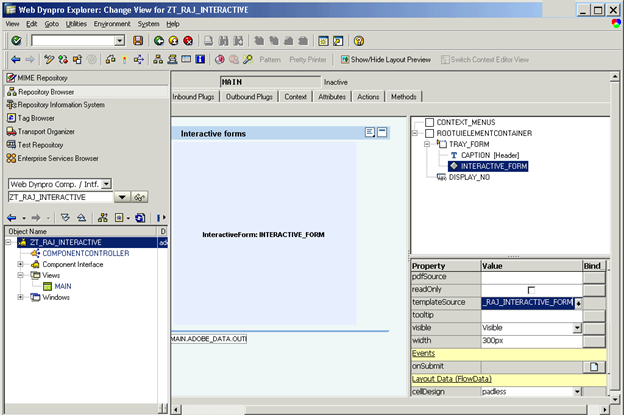
Step 10 :
Select it’s Property template Source and Enter any name for your ADOBE FORM.
Here we have use name as ZT_RAJ_INTERACTIVE_FORM. Press ENTER.
It will ask you the INTERFACE name for it. Give name as ZT_RAJ_INTERACTIVE_INTERFACE and click on the button CONTEXT.
(Note: you can create your own data for the interface but it is good to create it from our WEBDYNPRO CONTEXT as it will make your work easy)
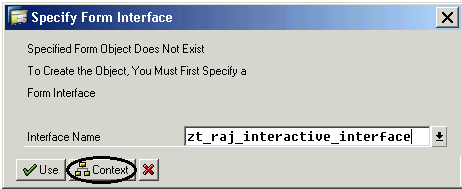
Select your ADOBE_DATA node and press ENTER.
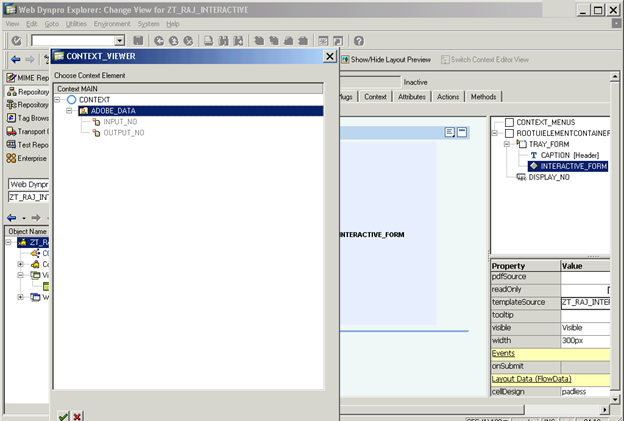
STEP 11 :
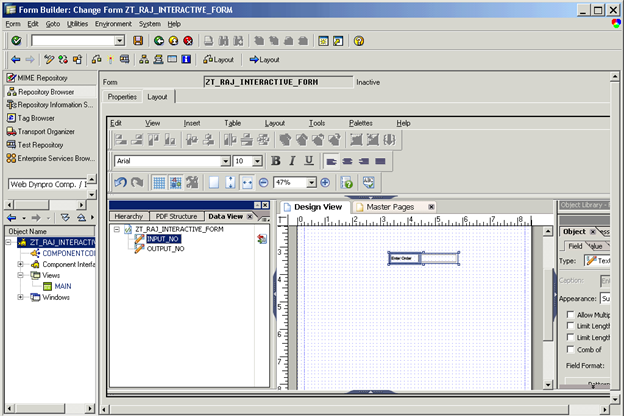
It will direct you to FORM Builder .(if it does not start just double click on the INTERACTIVE_FORM in your layout).
Here you can see the DATA View on the left side with your CONTEXT automatically. Drag the INPUT_NO and drop it in the Design View. Change the Description of the field according to your wish i.e. Enter Order.
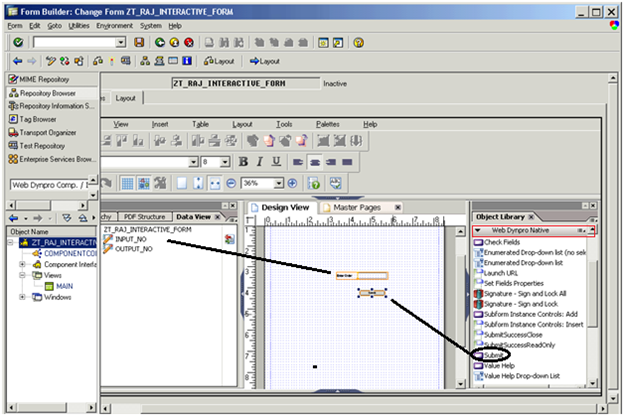
As per the requirement we also need one SUBMIT Button. Here we will be using native type of Form so go to the Object Library and SELECT SUBMIT Button.
Step 12:
This step is very important:
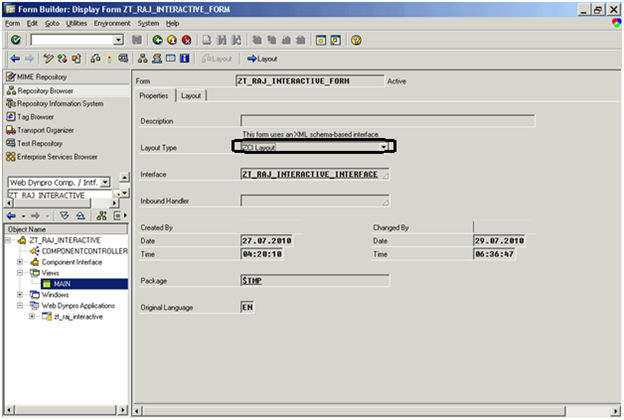
Go to the Property tab of your Form and select the layout as ZCI Layout.
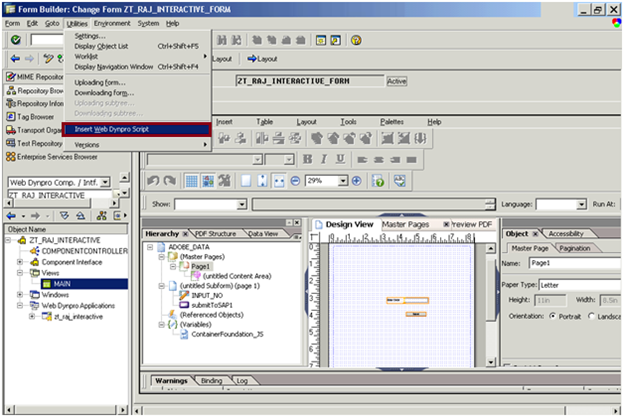
Go to UTILITES->Insert Web Dynpro Script.
This is necessary to make your INTERACTIVE FORM Visible on your Screen.
Step 13 :
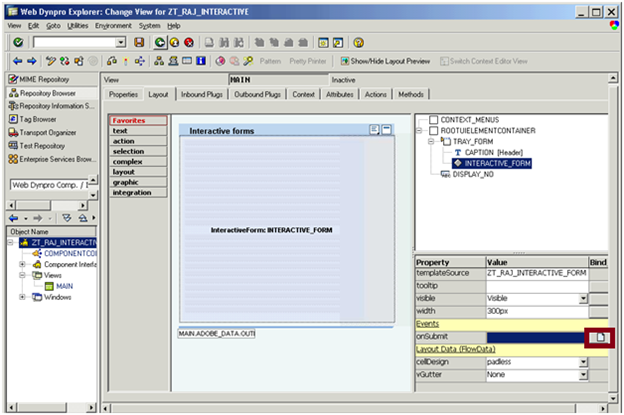
The Button which you have created in your FORM can be linked with EVENT in Webdynpro for ABAP.
To do this Double click on the INTERACTIVE_FORM and click on the Create ICON which is just beside the OnSubmit Property.
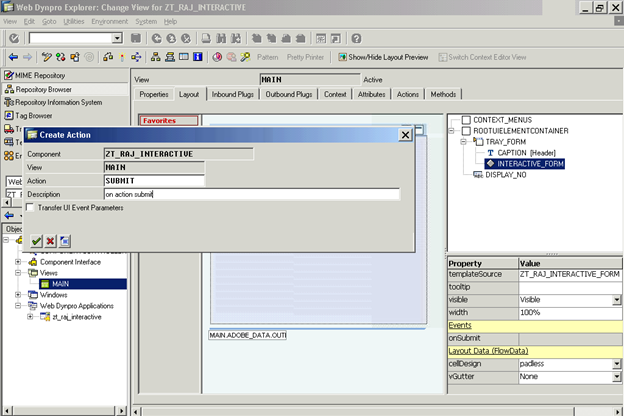
IT will ask you the ACTION name .Give the name as SUBMIT.IT will intern create a method called ONACTIONSUBMIT.
Step 14 :
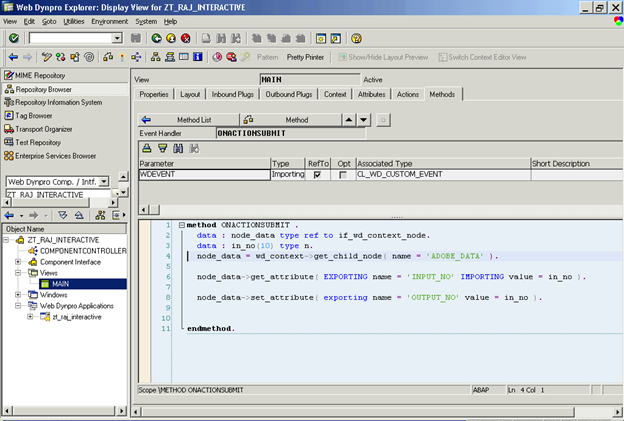
Go to the Methods tab of your MAIN View and Select the method ONACTIONSUBMIT.
Put the below code inside it.
(Note: As we have already mapped the INPUT_NO with the Forms field the number is already reached till the INPUT_NO of our MAIN view’s CONTEXT. Now we need to READ this ATTRIBUTE and put that DATA to OUTPUT_NO ATTRIBUTE . The below code is serving that purpose.)
data : node_data type ref
to if_wd_context_node.
data : in_no(10) type n.
node_data = wd_context->get_child_node( name = ‘ADOBE_DATA’ ).
node_data->get_attribute( EXPORTING name = ‘INPUT_NO’
IMPORTING value = in_no ).
node_data->set_attribute( exporting name = ‘OUTPUT_NO’
value = in_no ).
Step 15:
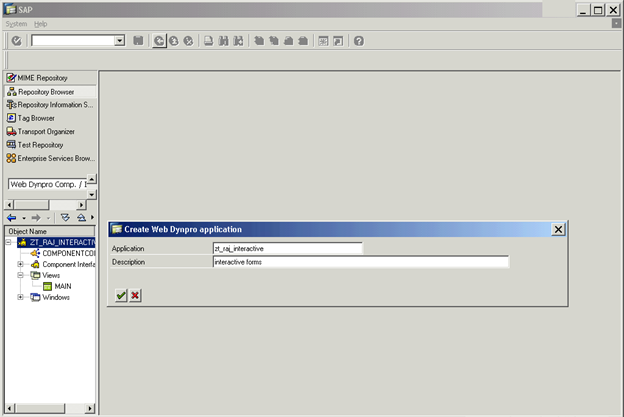
Right click on your Webdynpro Component and create application named ZT_RAJ_INTERACTIVE.
Step 16 :
In this step you need to pray that you can see your interactive formJ.
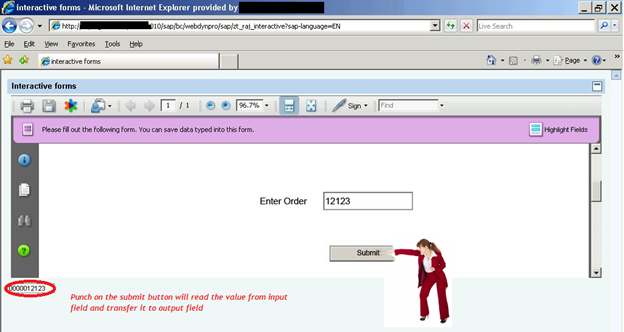
Any way Execute your application ZT_RAJ_INTERACTIVE .Enter the value in the form “Enter Order “field and click on the Submit button. Check the below screen shot.
